做完CMU的15-213,把CS:APP这本书囫囵吞枣的过了一遍,把相关的Lab稍微整了整… 感觉CS:APP最后关于操作系统的部分讲的不是很全,所以这就开始学习MIT 6.S081操作系统的内容,希望能有所收获吧。
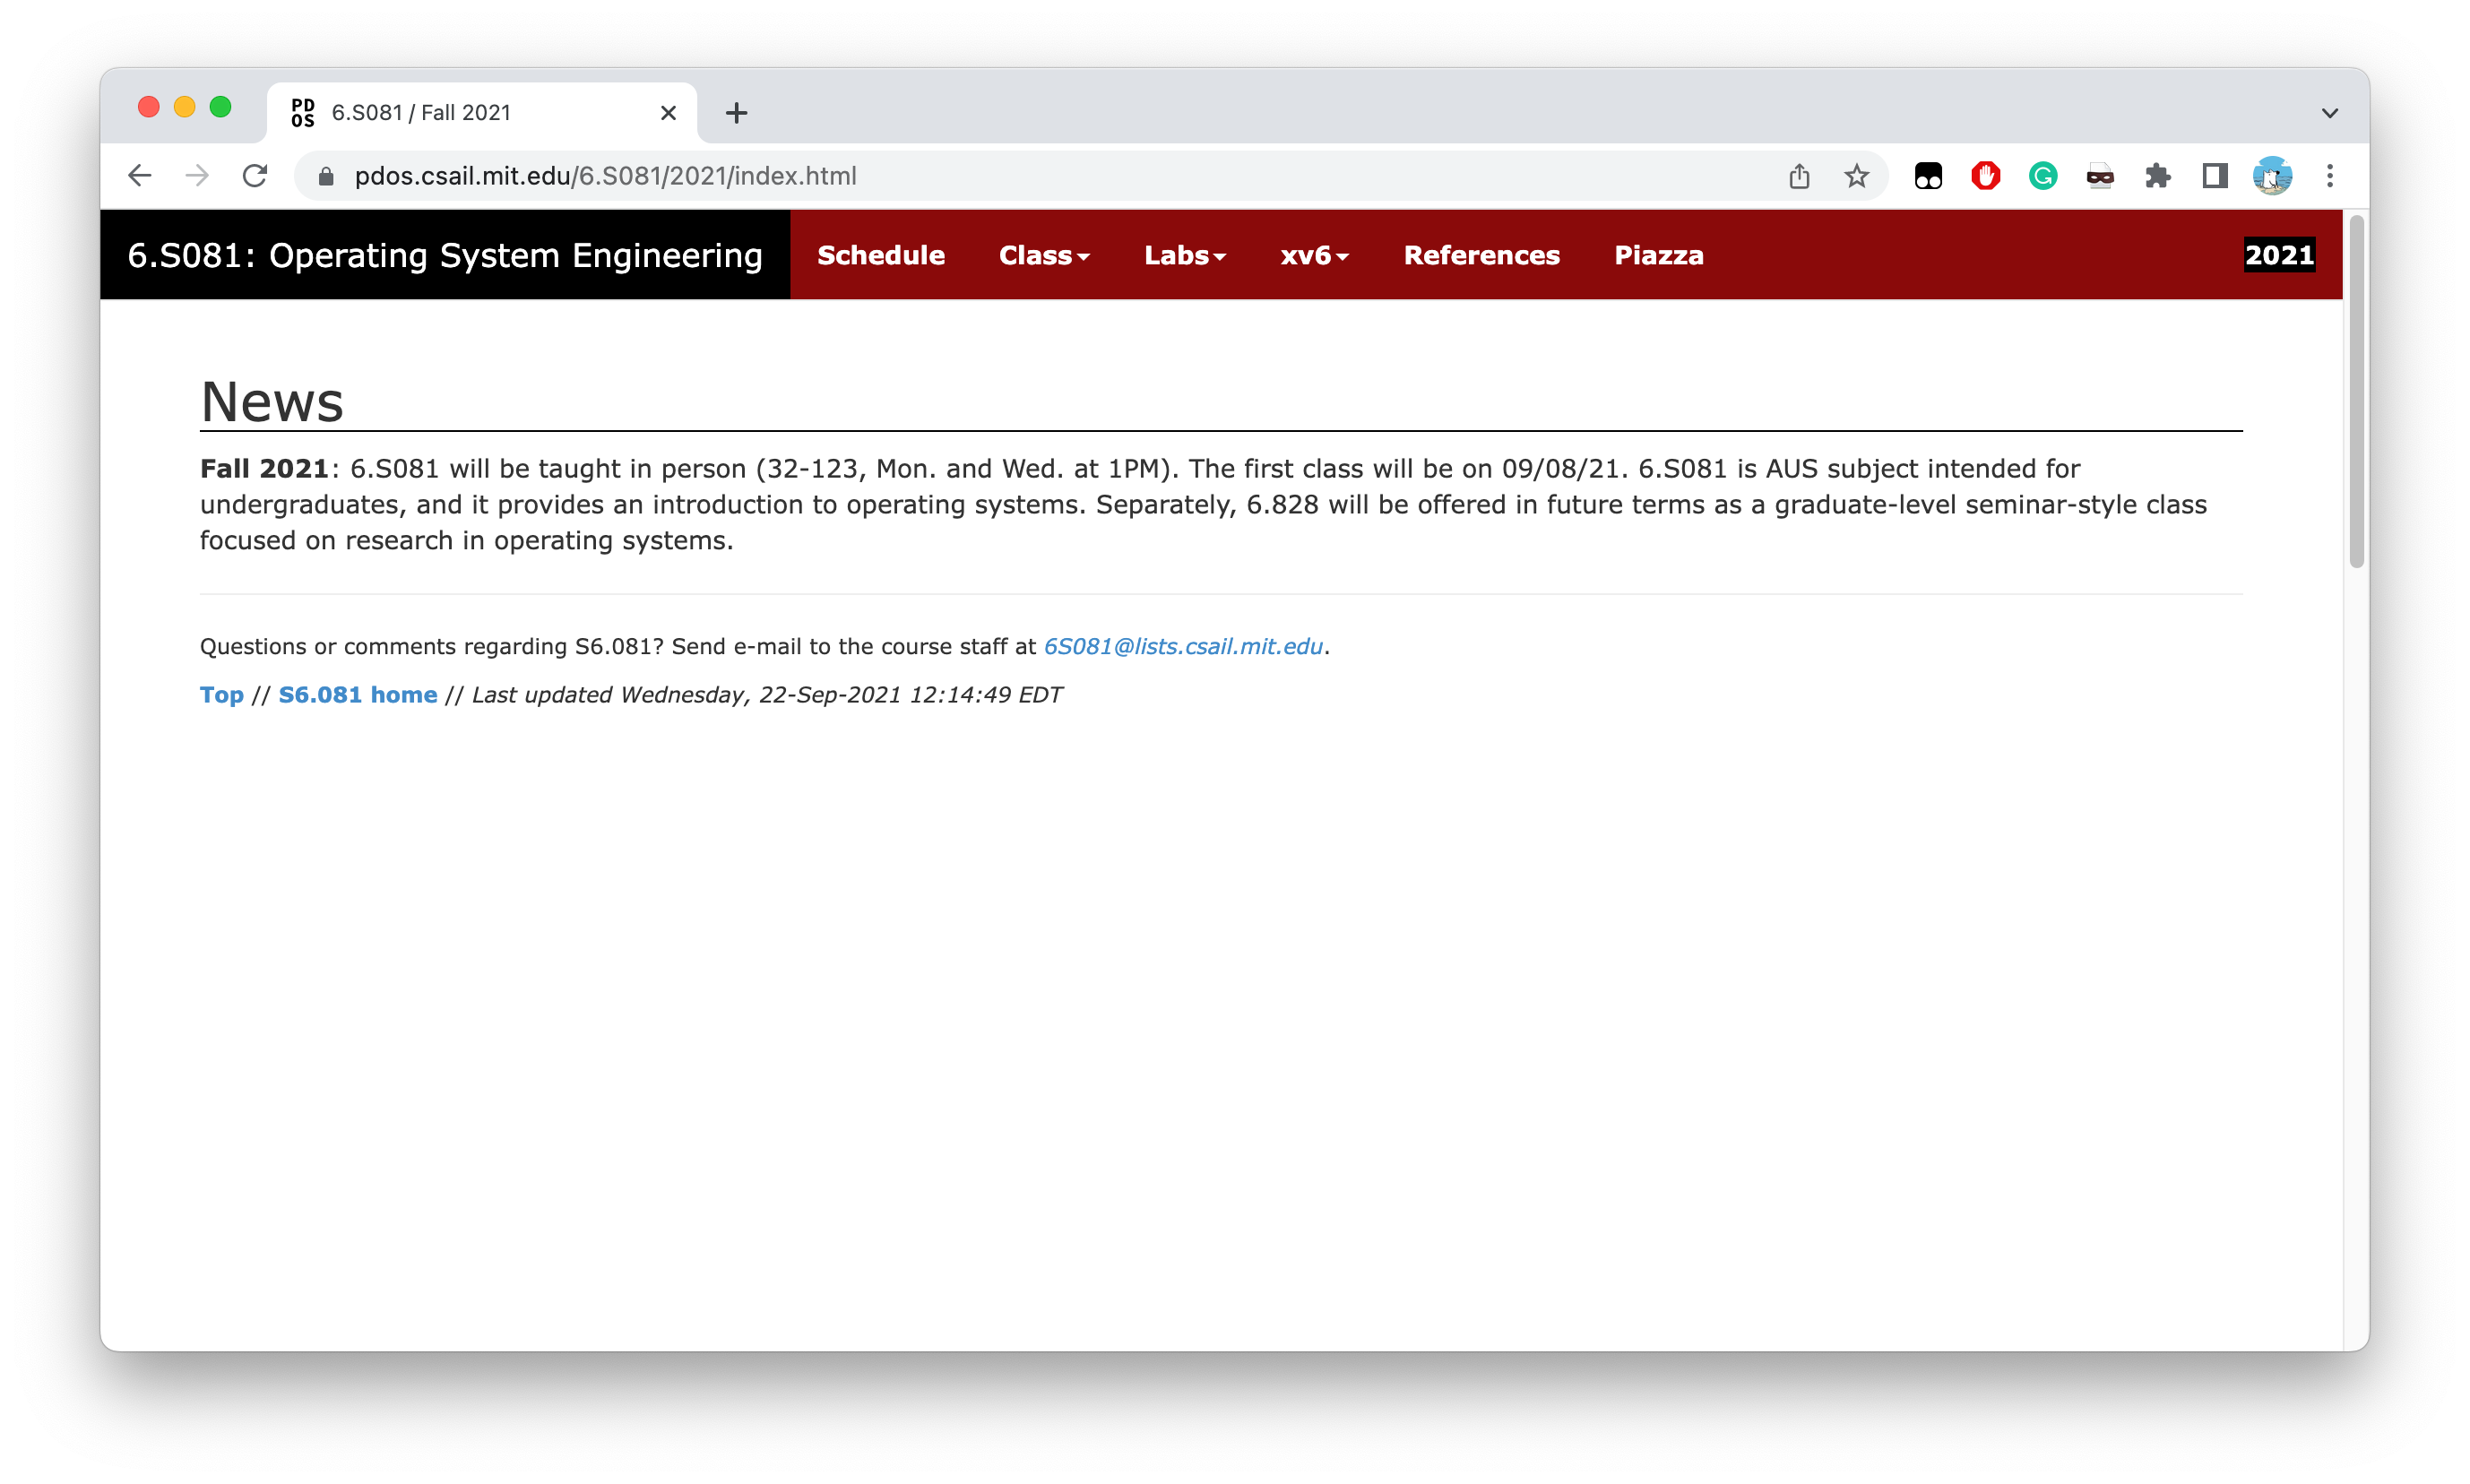
MIT 6.S081的最新课程官网在这里:6.S081 / Fall 2021 - MIT PDOS
目测MIT 6.S081和MIT 6.828是相关课程,但是MIT 6.S081是面向本科生的课程,更加注重基础,而MIT 6.828是面向研究生的,以一种研讨会的风格,更加靠近论文和研究… 算了,没基础还是不去凑什么热闹了
MIT 6.S081有一门先修课程MIT 6.S004,目测是计算机组成原理相关的,学了CS:APP大概也许… 也能做吧
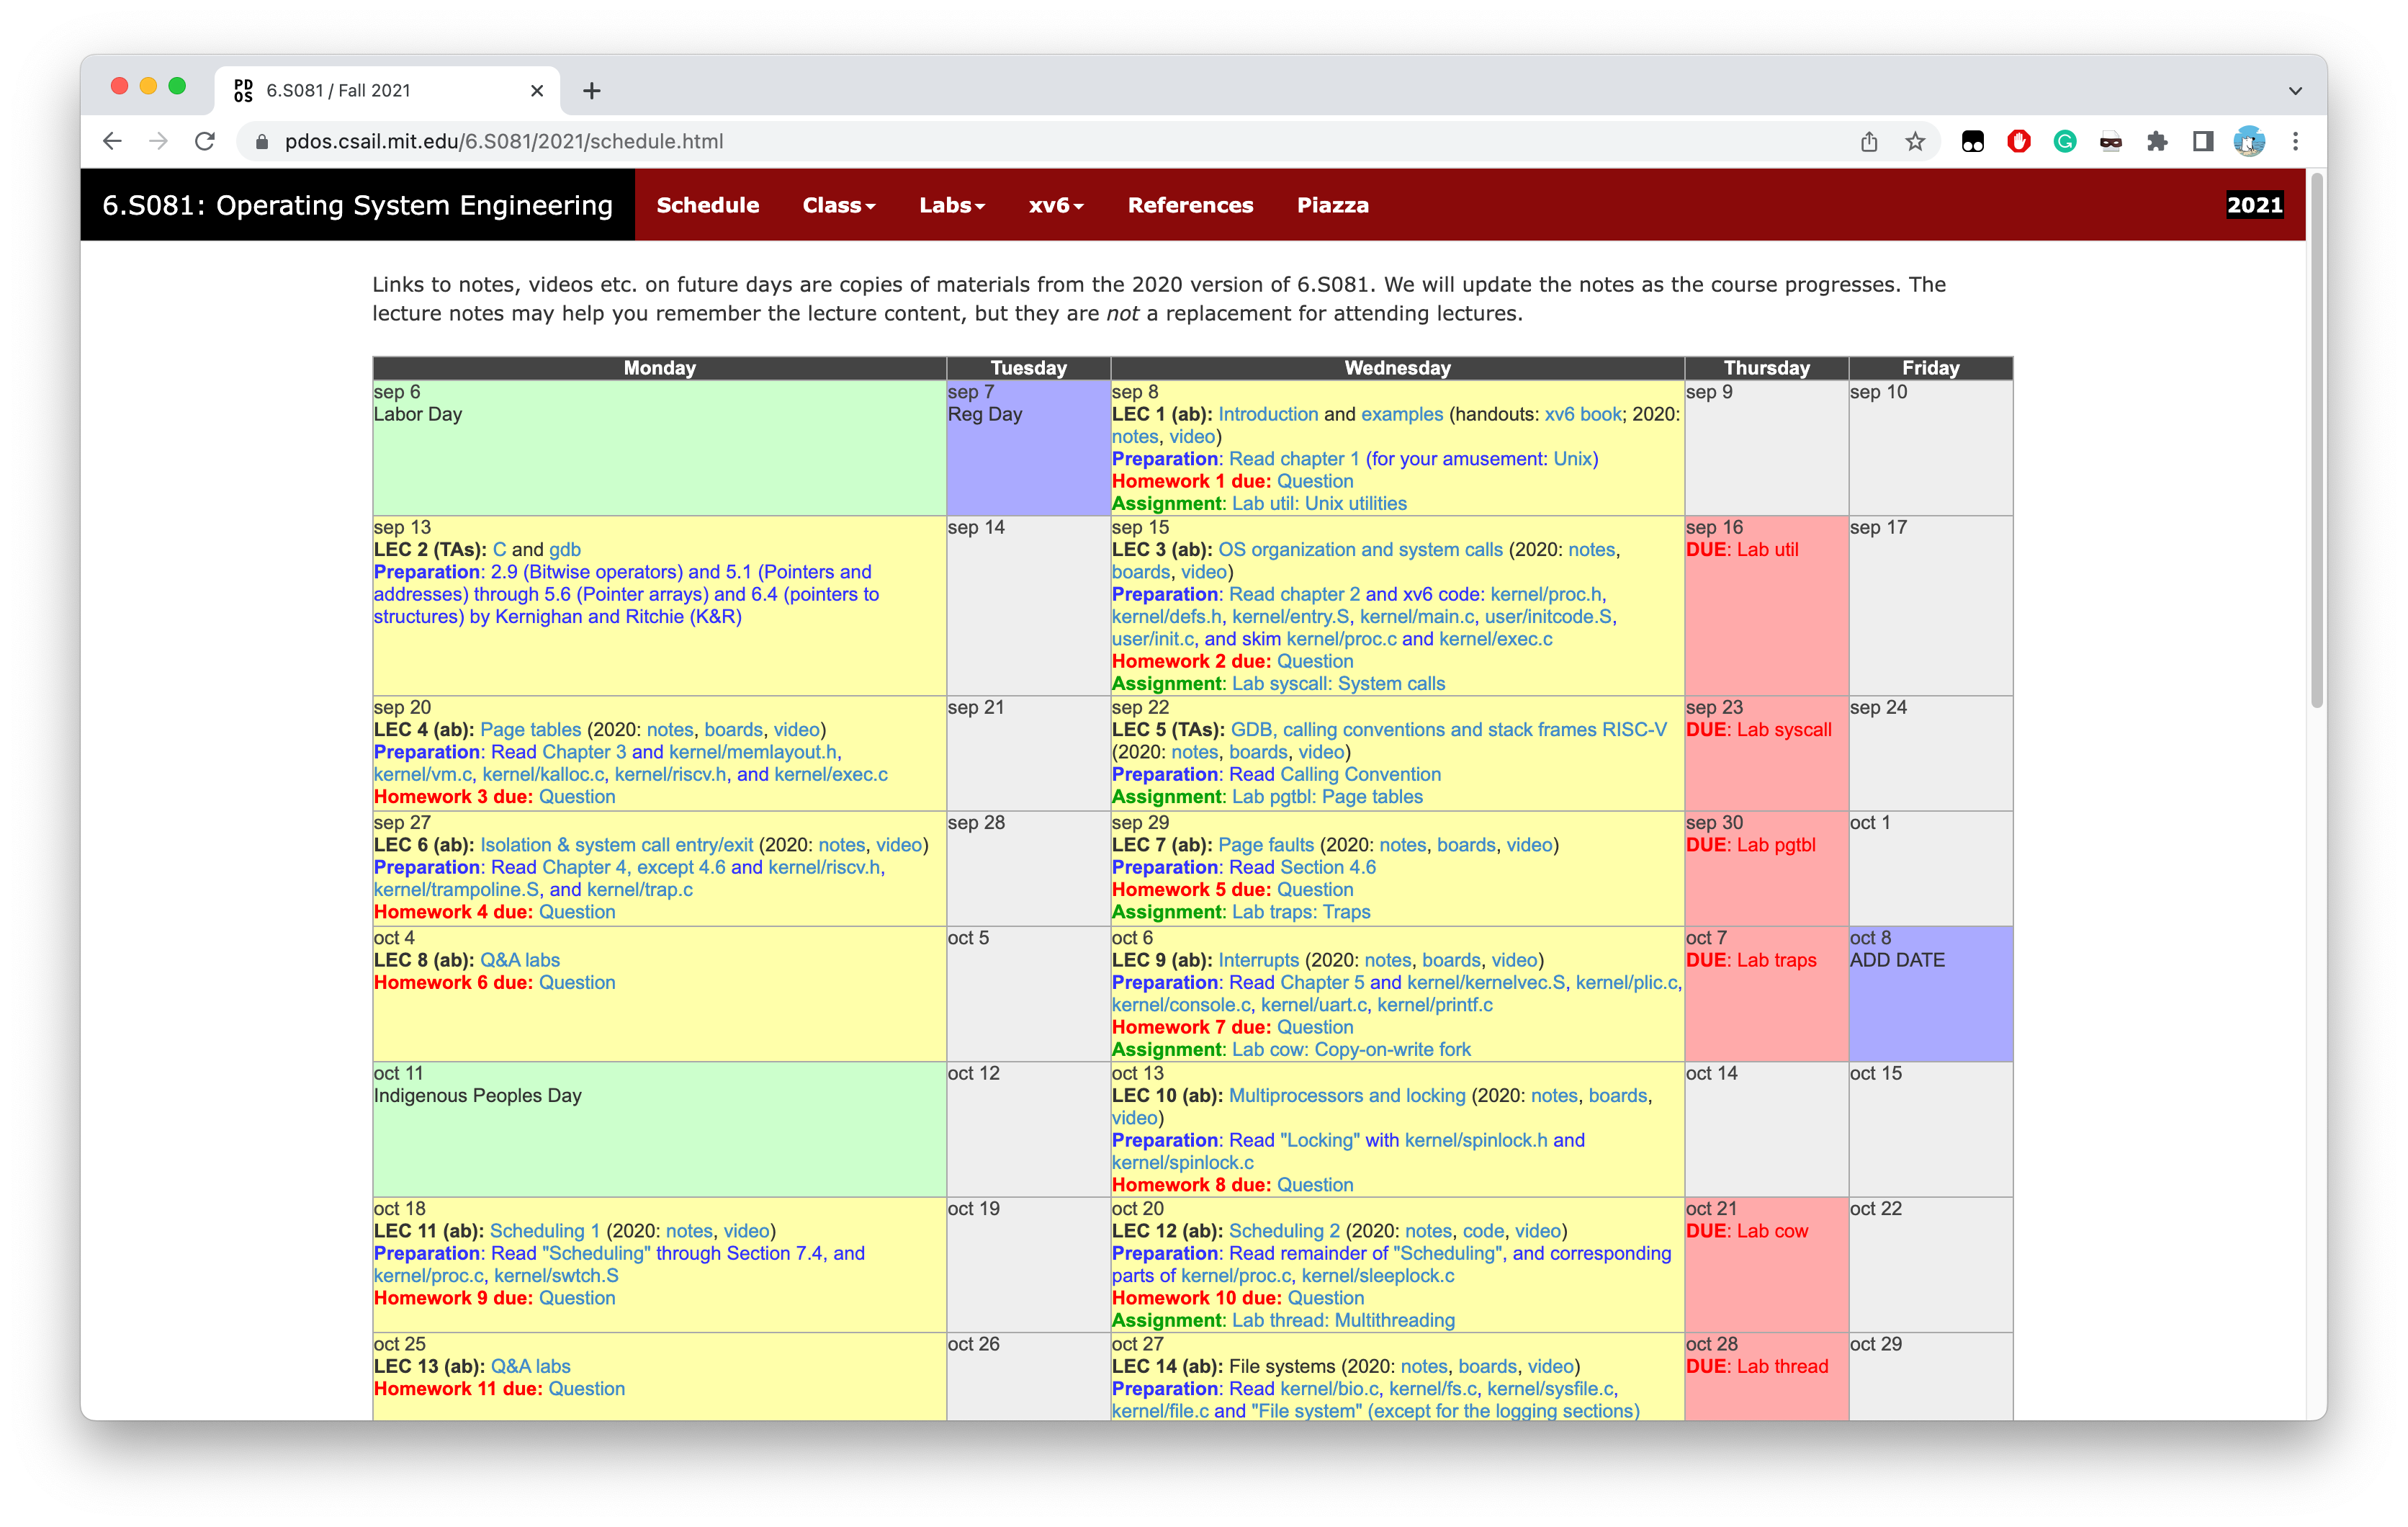
在课程日程 里,我们能够看到相关课程安排,包括每次上课的内容、需要阅读的教材章节、上课的视频、关键笔记以及Lab大作业。
随便点开几个网课视频Video就能发现,转到的YouTube网课视频貌似都是2020年的,小问题…
而且这次B站上面有比较好的翻译字幕,中英文就很棒:6.S081 / Fall 2020 [麻省理工操作系统 - 2020 年秋季][中英文字幕] ,感谢佬的翻译,相关的GitHub仓库在6.S081-2020-video-subtitles 。
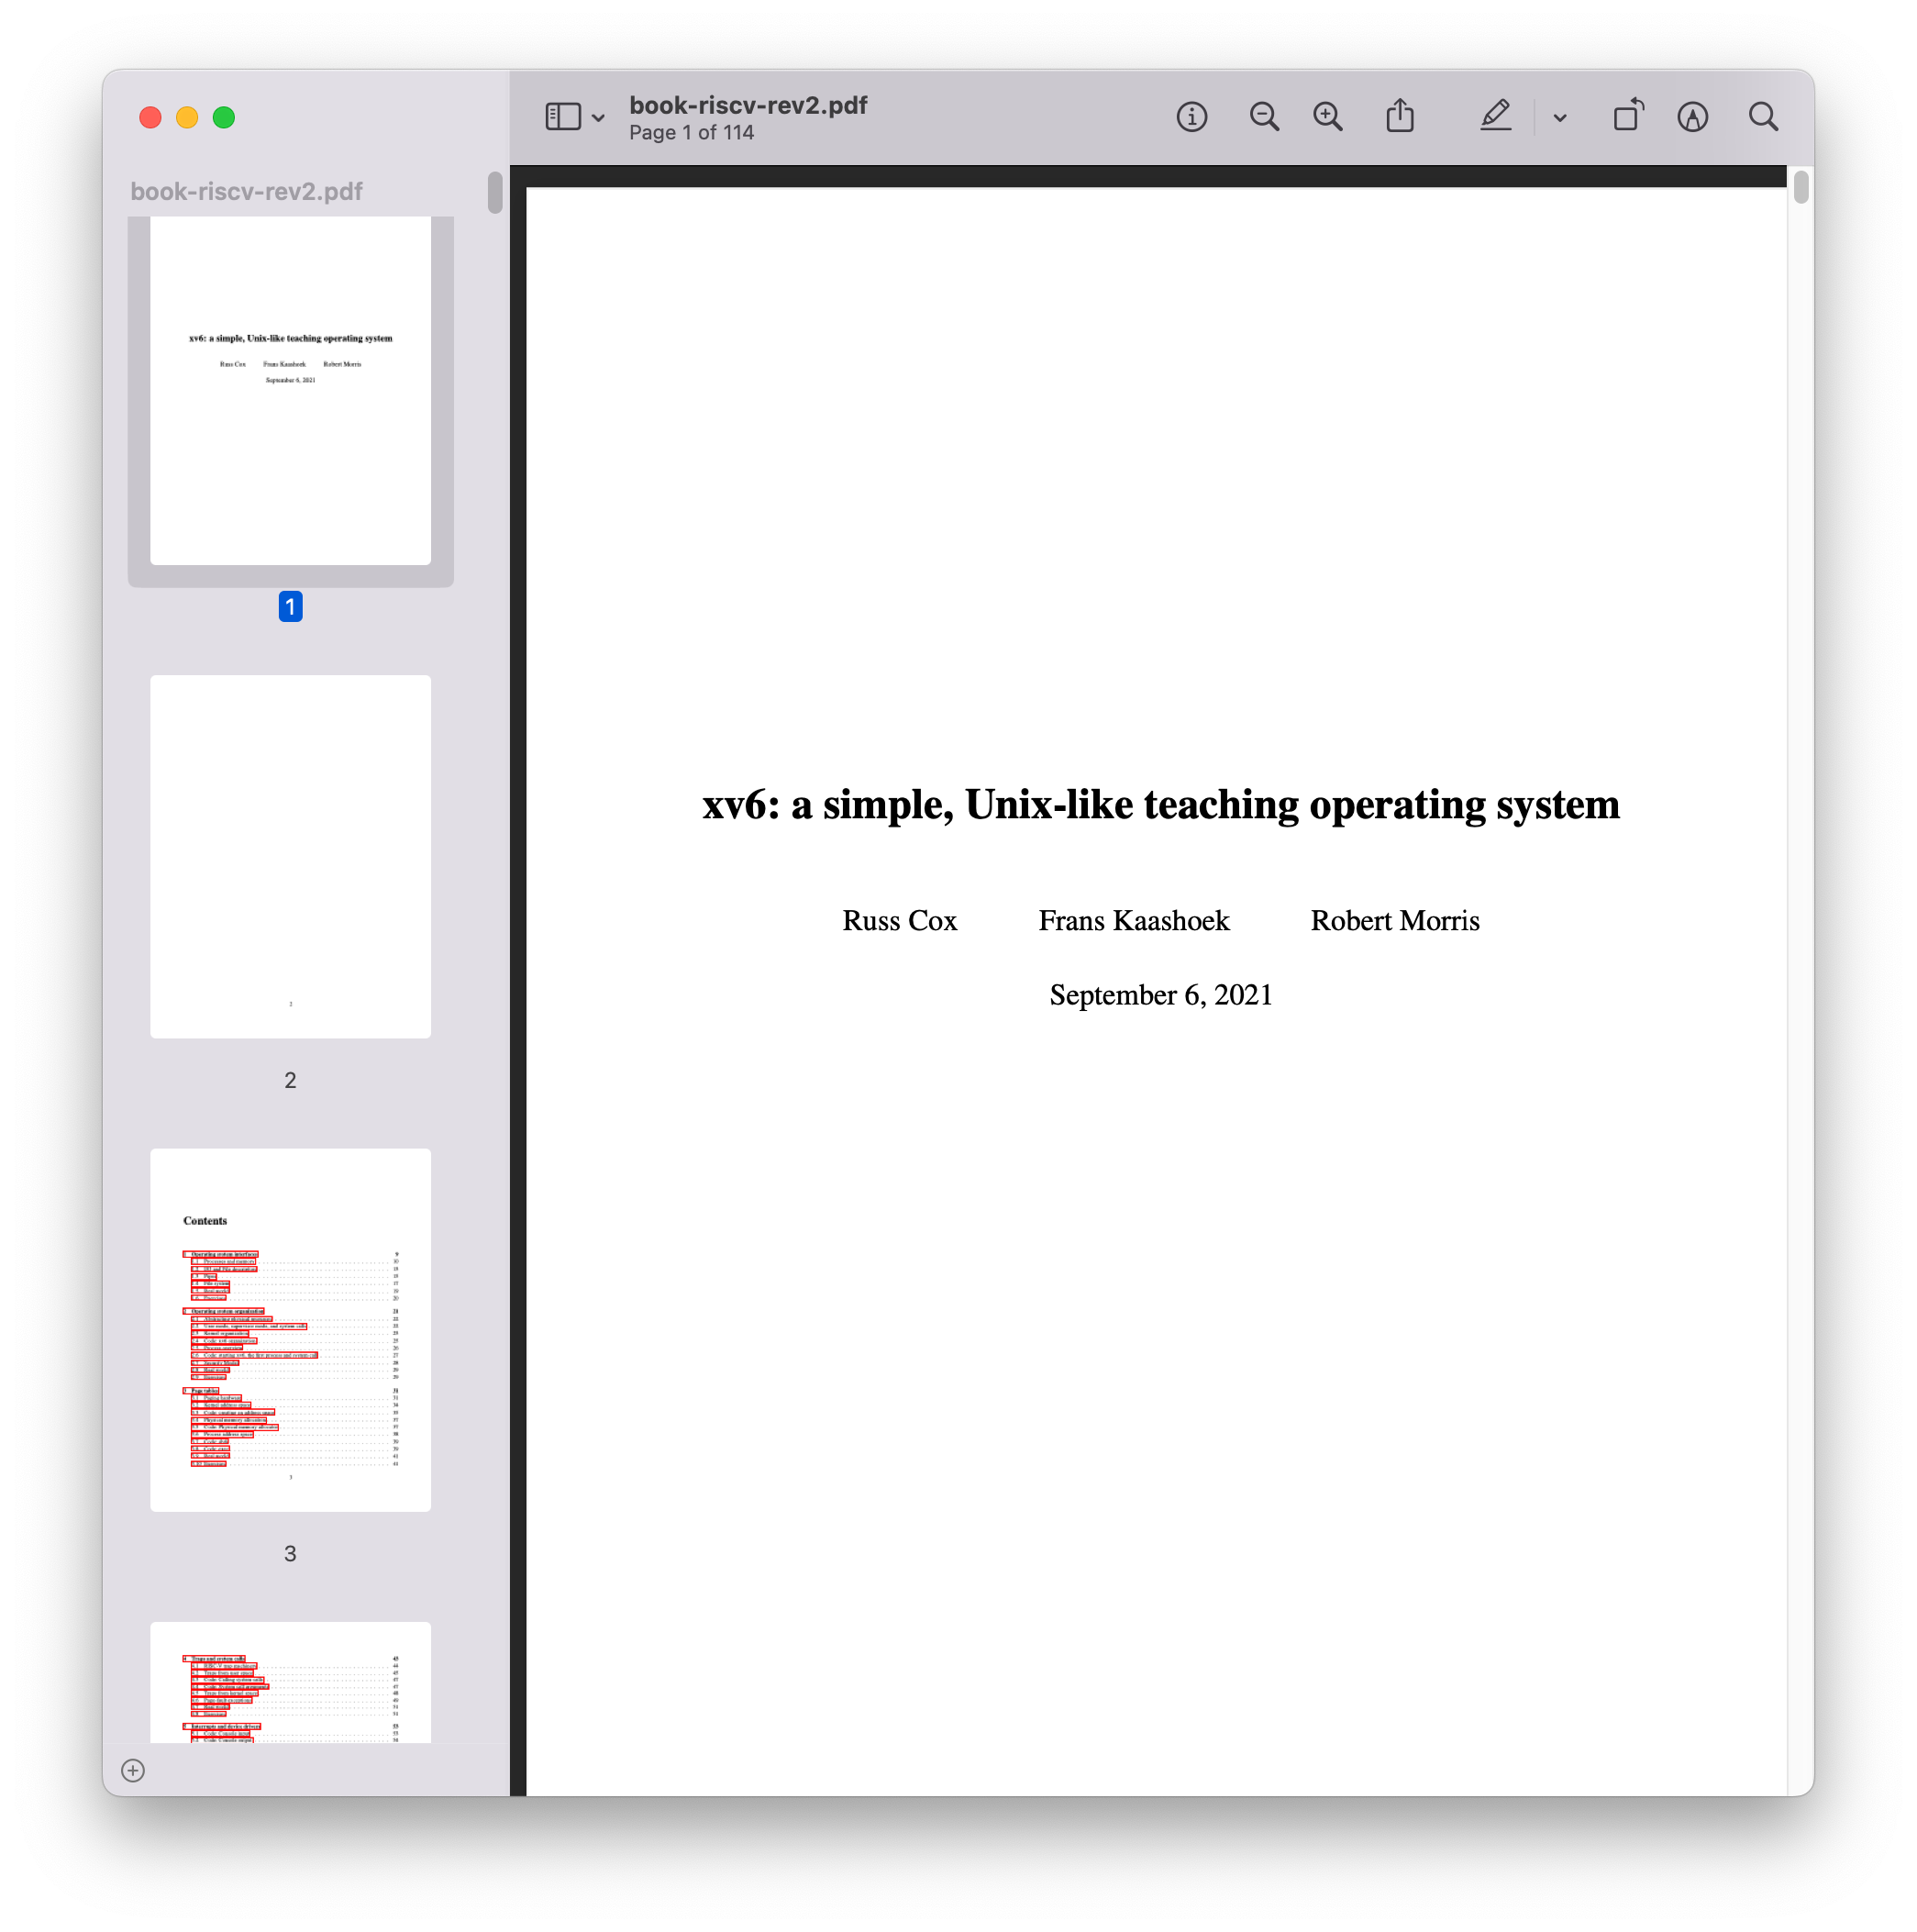
教材方面,MIT 6.S081的最新教材目前是2021年版,可以从下载链接 获取。
此外也可通过git从仓库拉取最新教材:
1 git clone git://github.com/mit-pdos/xv6-riscv-book.git
全英文,估计读起来会有亿点点难受,不过还好(就是有点催眠)。
准备
对应课程
本次的作业是Lab Util,大概就是简单的写一些使用系统调用实现的程序吧,你需要看掉Lecture 1,也就是B站课程 的P1,另外你需要阅读教材第一章Operating system interfaces。
系统环境
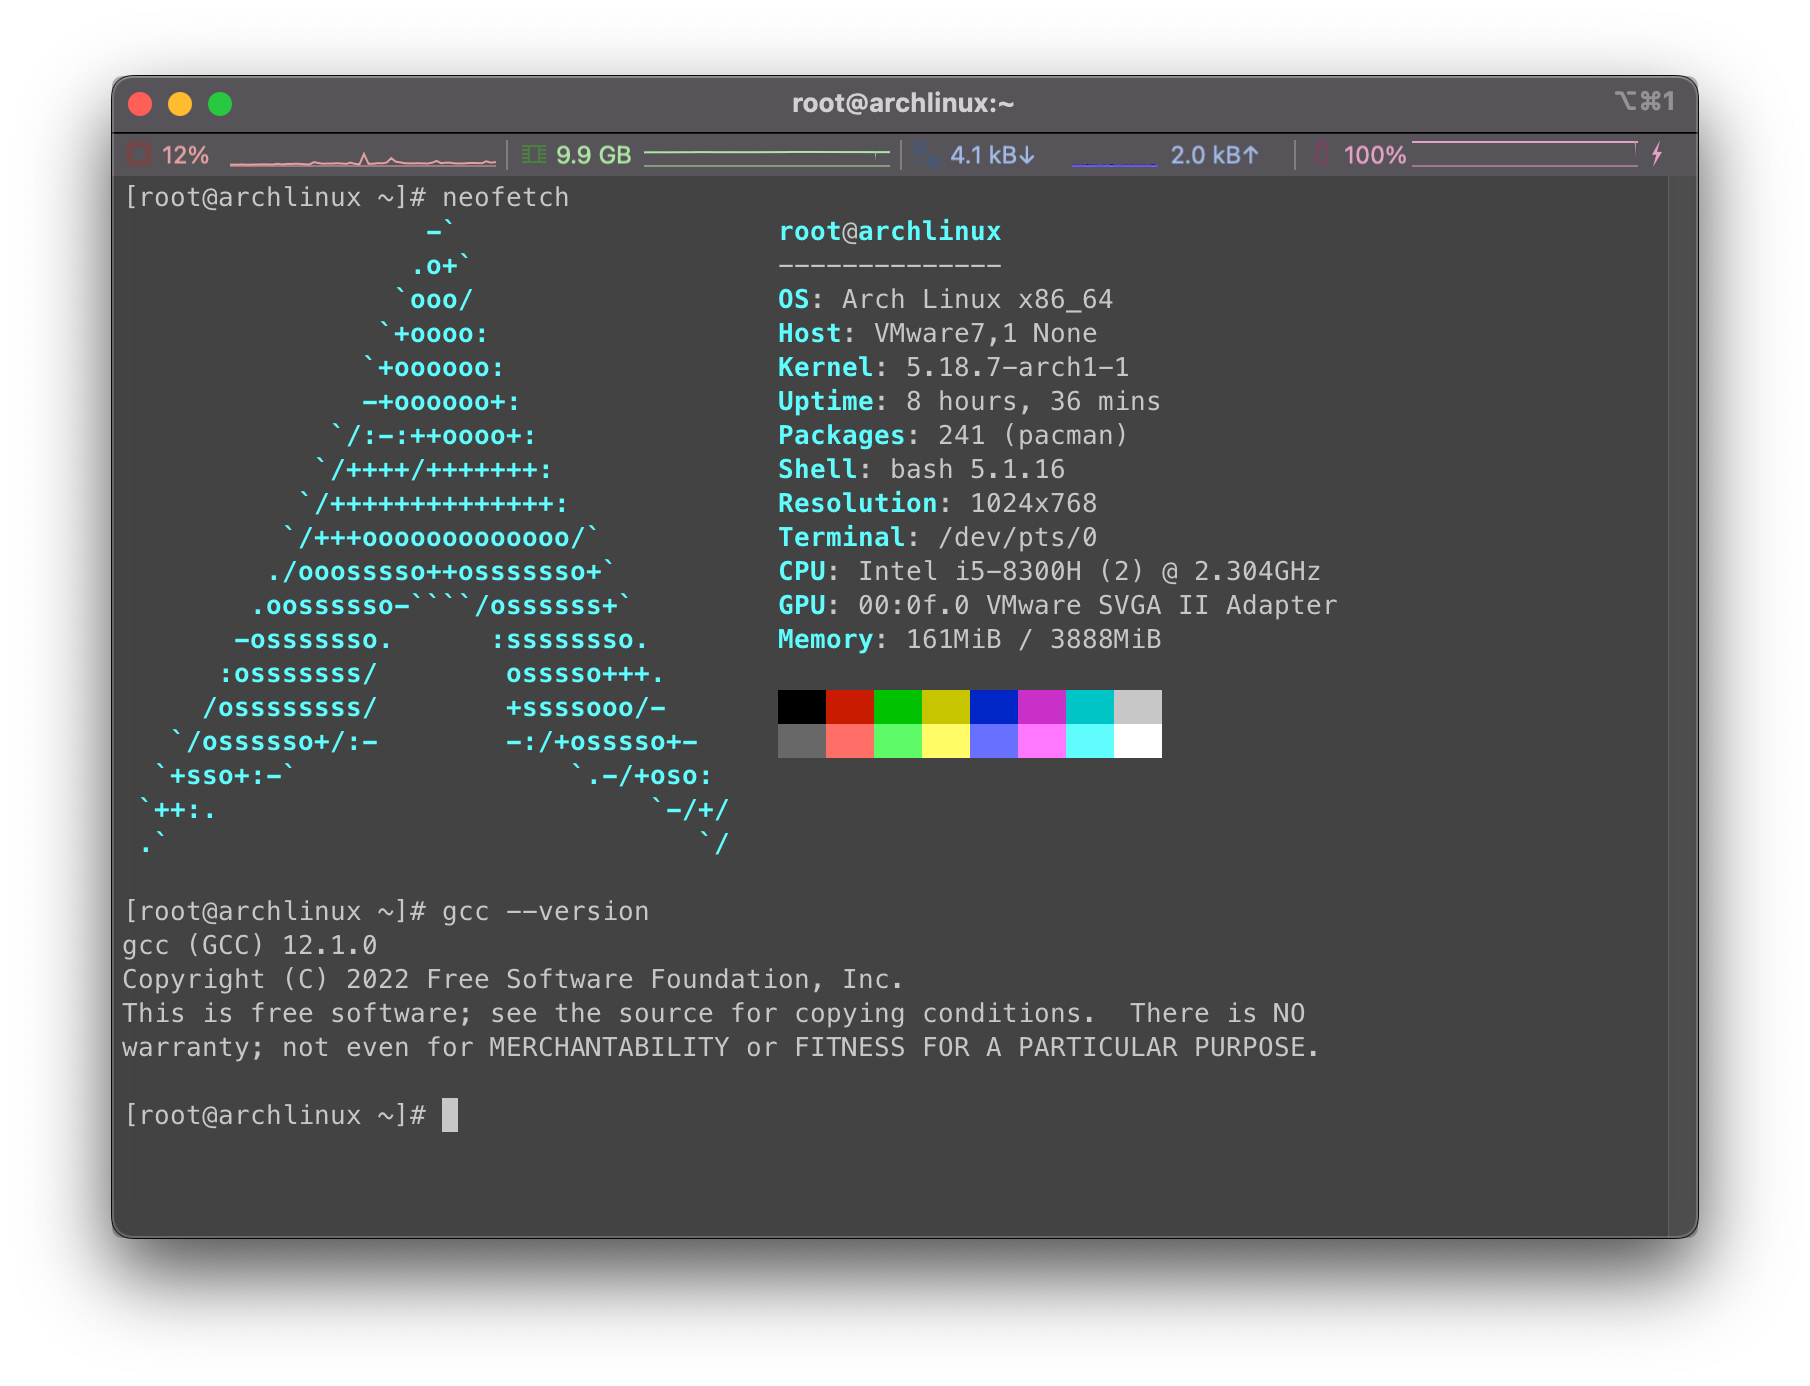
继续使用Arch Linux虚拟机作为我的实验机器:
使用准备
本课程的相关实验都是基于在RISC-V微处理器下的xv6操作系统,因此我们使用QEMU模拟器来实现硬件的模拟。
在Lab Util网页中,课程给出了保姆级教程,详见Lab: Xv6 and Unix utilities 。
首先是环境配置,详见Tools Used in 6.S081 。你可以在macOS、Linux和Windows WSL中进行环境的配置。
以Arch Linux为例,请安装QEMU 5.1+, GDB 8.3+, GCC和 Binutils等组件:
1 sudo pacman -S riscv64-linux-gnu-binutils riscv64-linux-gnu-gcc riscv64-linux-gnu-gdb qemu-arch-extra
接下来,我们从仓库中clone下来我们的整个课程作业:
1 git clone git://g.csail.mit.edu/xv6-labs-2021
切换到本次作业的util分支:
1
2
cd xv6-labs-2021 git checkout util
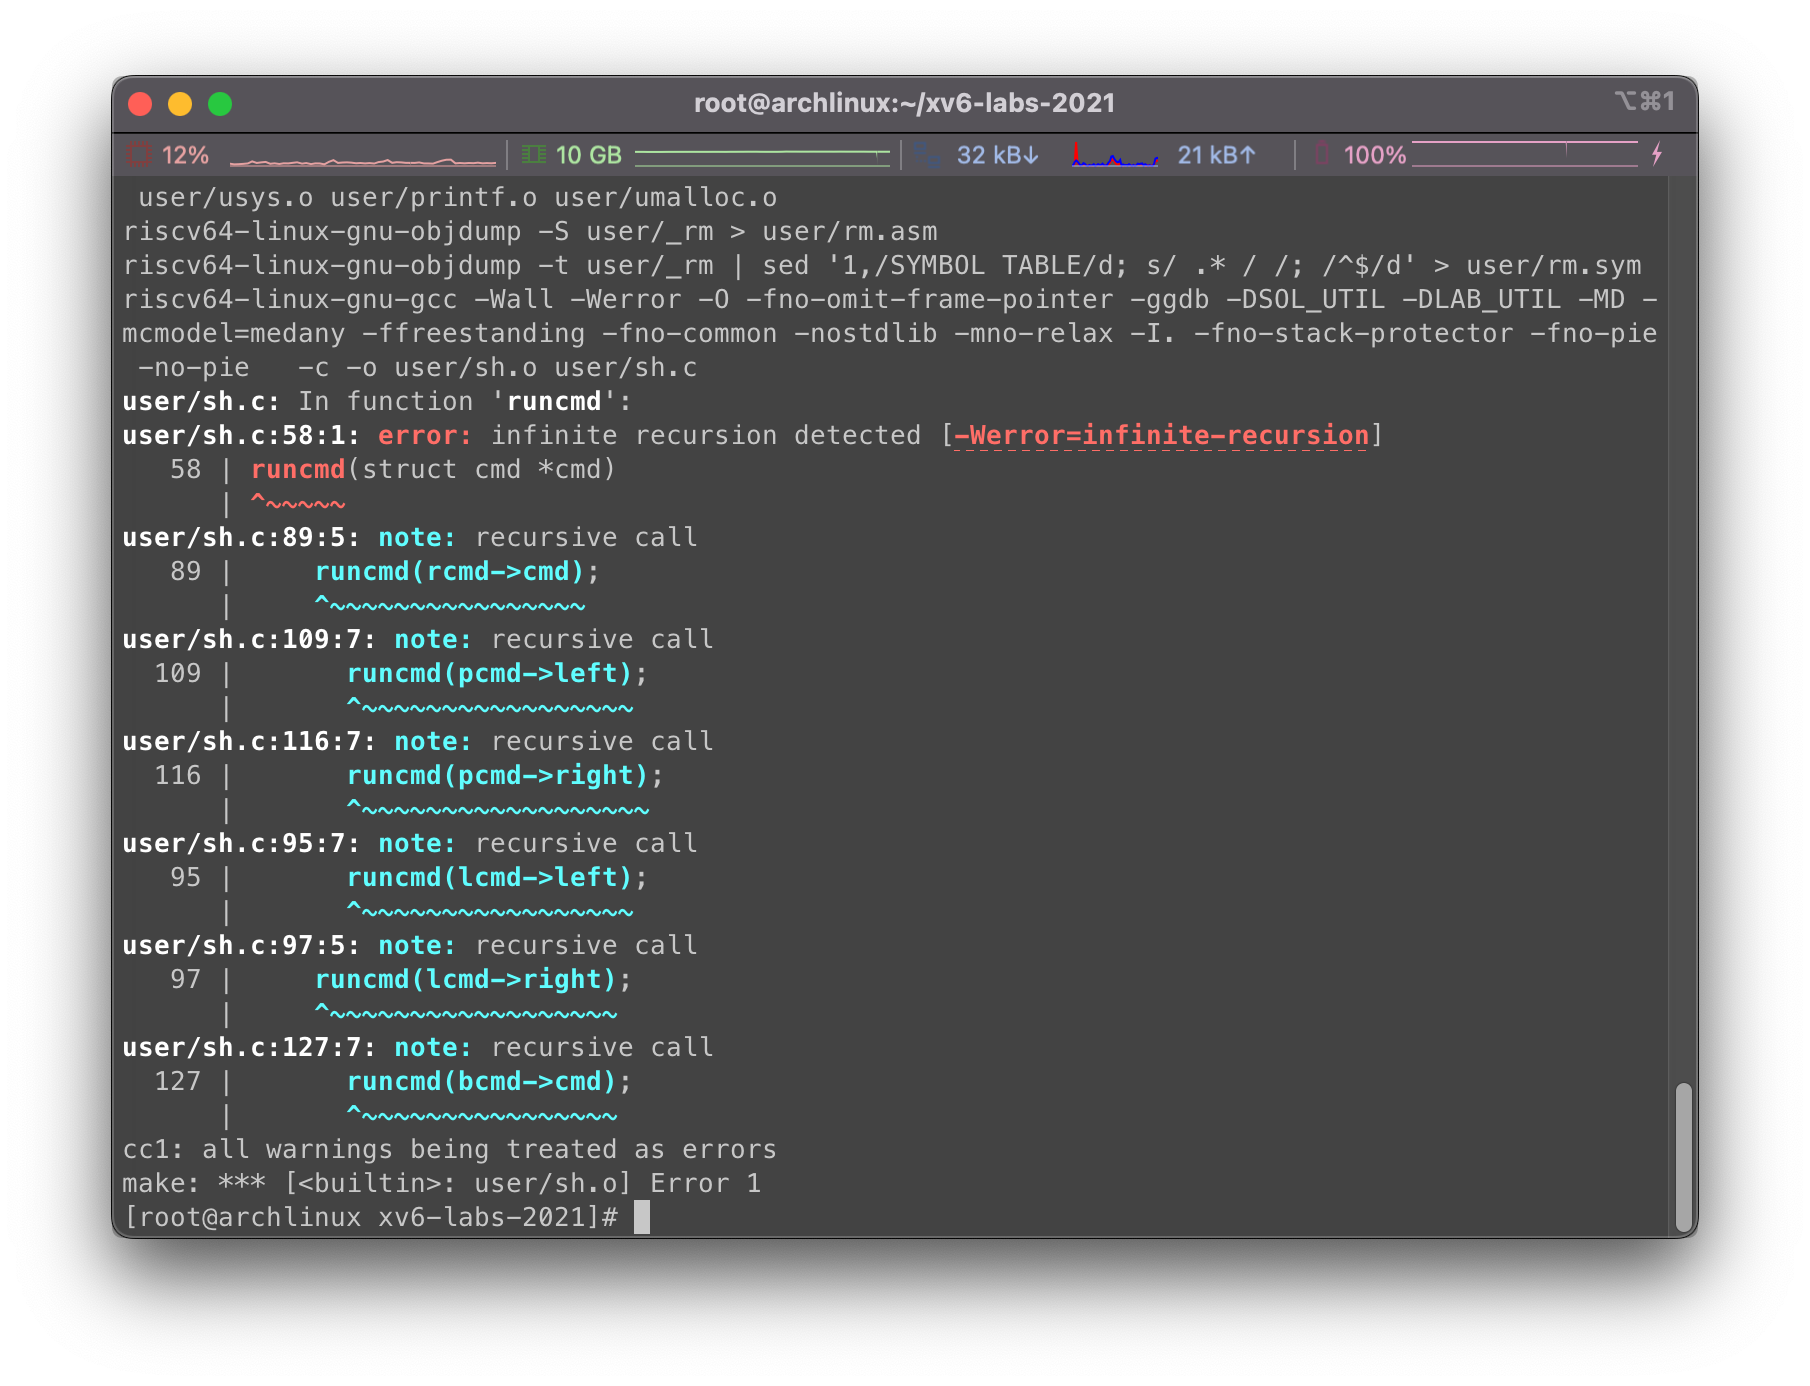
我们可以使用make qemu安装,可能会遇到错误infinite recursion detected:
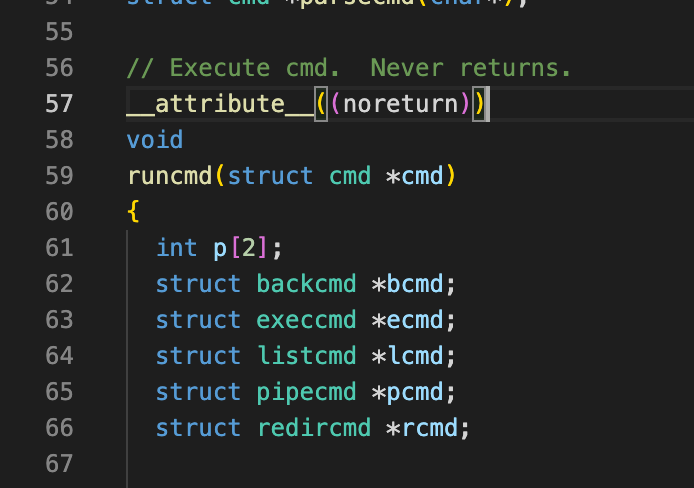
解决方案见Not treat infinite-recursion as error #126 ,我们选择在./user/sh.c中添加一行__attribute__((noreturn)):
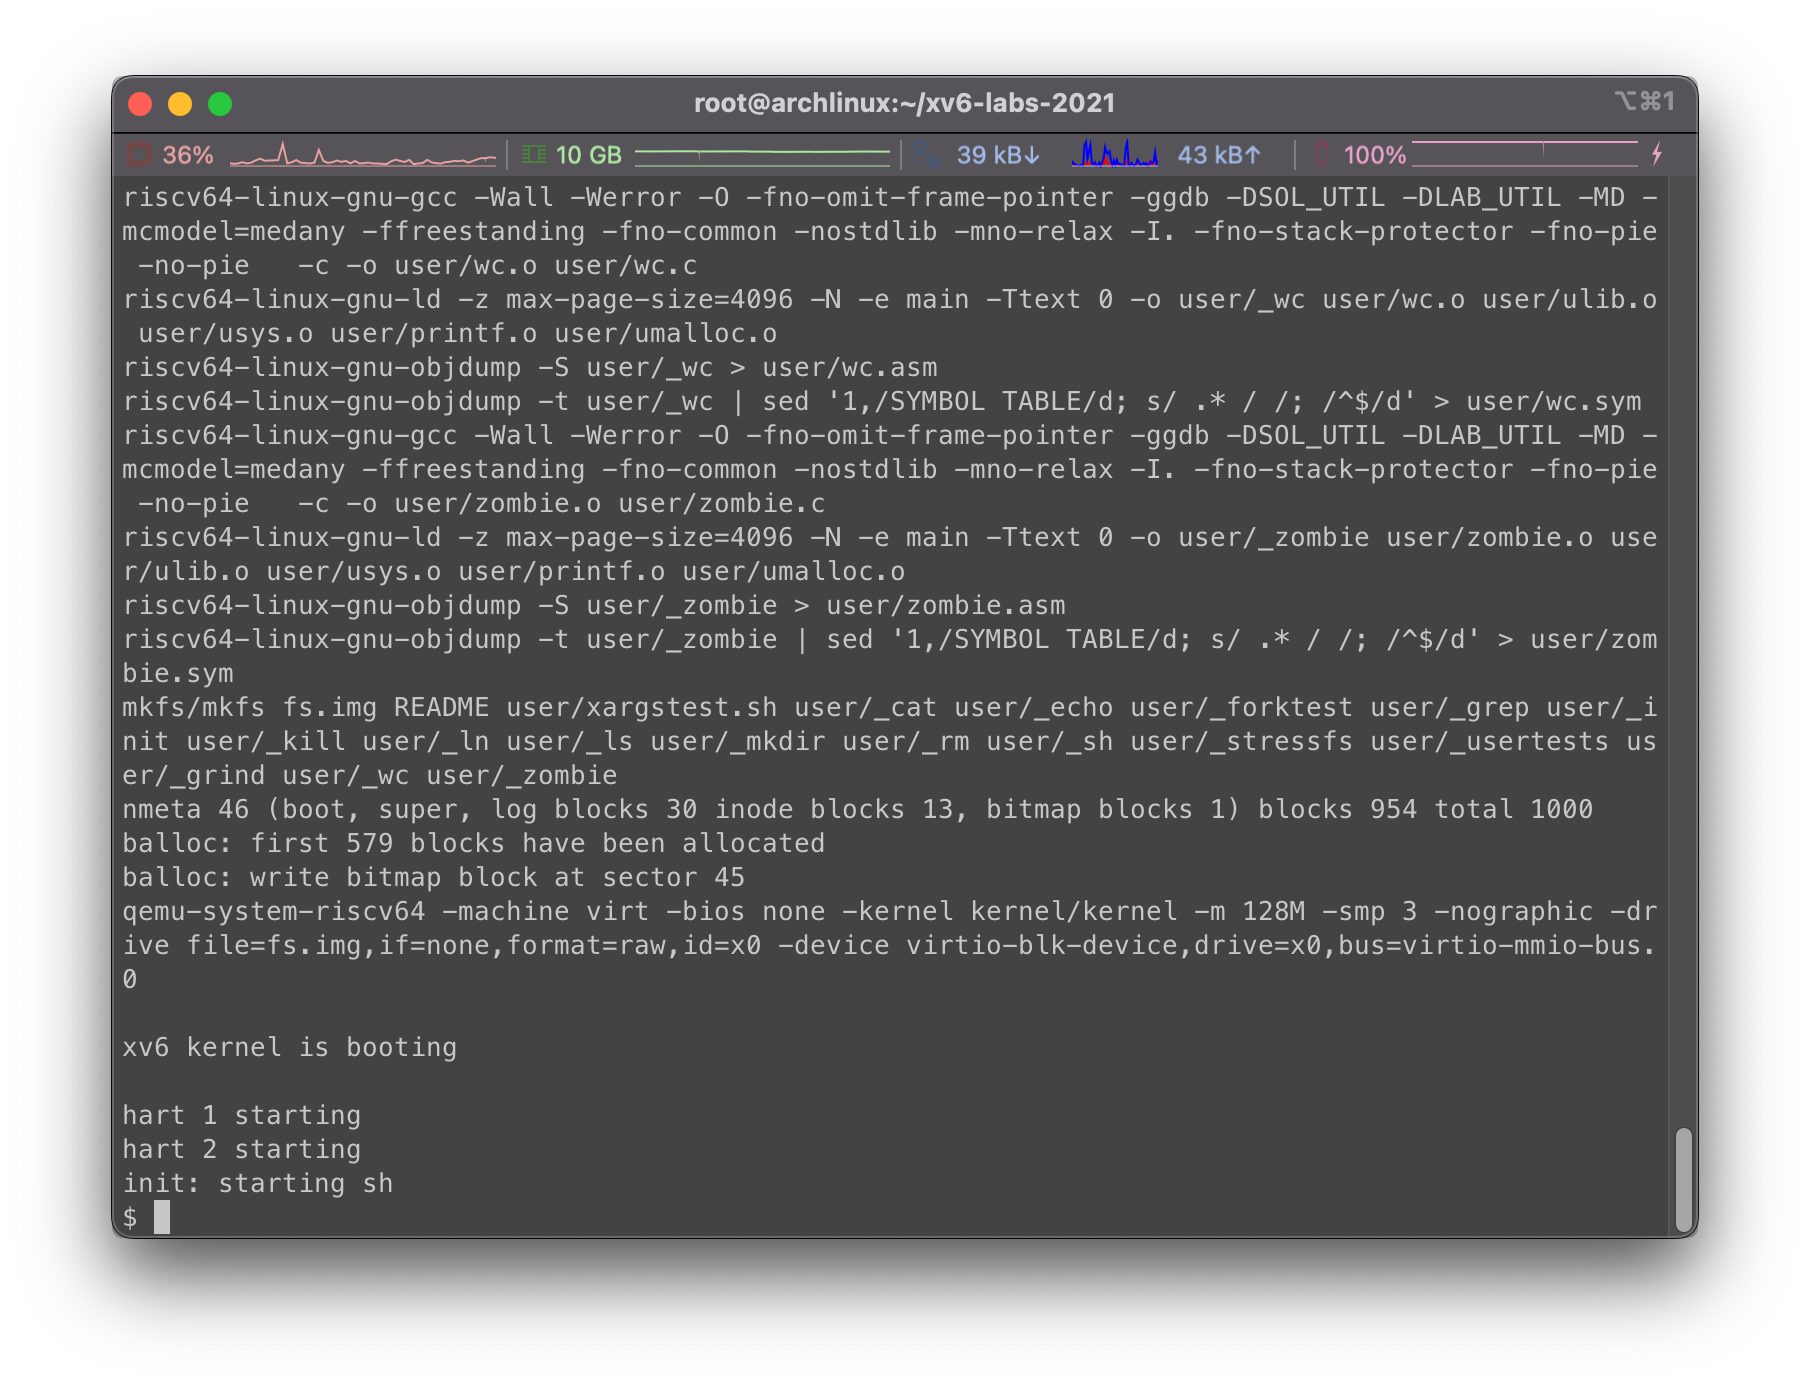
保存之后在主目录下继续执行make qemu即可,我们将得到一个命令提示符终端:
在终端中,我们可以执行我们相关程序,例如ls,cat等。
使用组合键Ctrl+A,随后按X可以退出当前模拟器。
在作业完成后可以使用make grade对所有结果进行评分。
题目
实现sleep
要求
在本部分中,需要我们实现xv6操作系统的sleep程序,即给定指定的tick数量,其中tick是xv6内核定义的一个时间概念,即来自定时器芯片的两个中断之间的时间,sleep程序就会暂停响应的时间。我们需要将对应的程序sleep.c存储在user/目录下。
有几点提示:
当用户忘记传递变量时,我们需要打印出错误信息。
命令行传递了一个字符串参数,我们可以使用atoi将其转换成整型,atoi程序见user/ulib.c。
需要我们调用sleep系统调用,可以查看kernel/sysproc.c中实现sleep系统调用的相关代码(详见sys_sleep)。此外user/user.h中可以看到sleep从用户程序调用的定义,为了sleep从用户代码跳转到内核的汇编代码见user/usys.S。
请在main函数中调用exit()来退出你的程序。
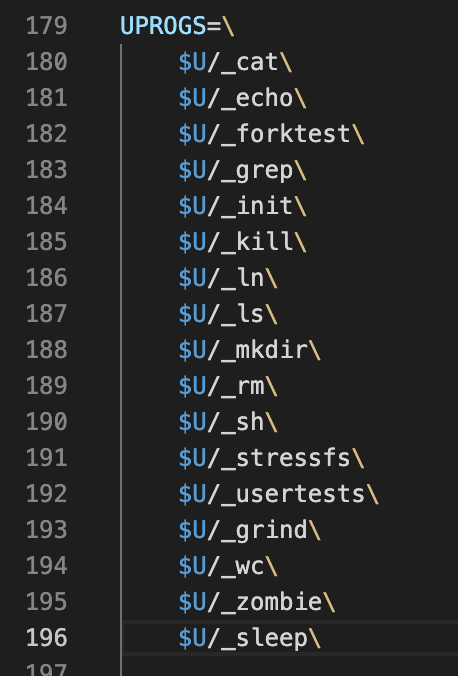
务必将sleep程序添加进Makefile文件的UPROGS中,将其纳入编译范围,否则操作系统将不能识别你的命令。后续程序同理。
实现
代码是很简单,我们根据user/目录下的其他代码,稍作参考:
1 2 3 4 5 6 7 8 9 10 11 12 13 #include "kernel/types.h" #include "kernel/stat.h" #include "user/user.h" int main (int argc, char **argv) { if (argc != 2 ) { fprintf (2 , "Usage: sleep <ticks>\n" ); exit (1 ); } int time = atoi(argv[1 ]); sleep(time); exit (0 ); }
接下来修改Makefile,添加sleep:
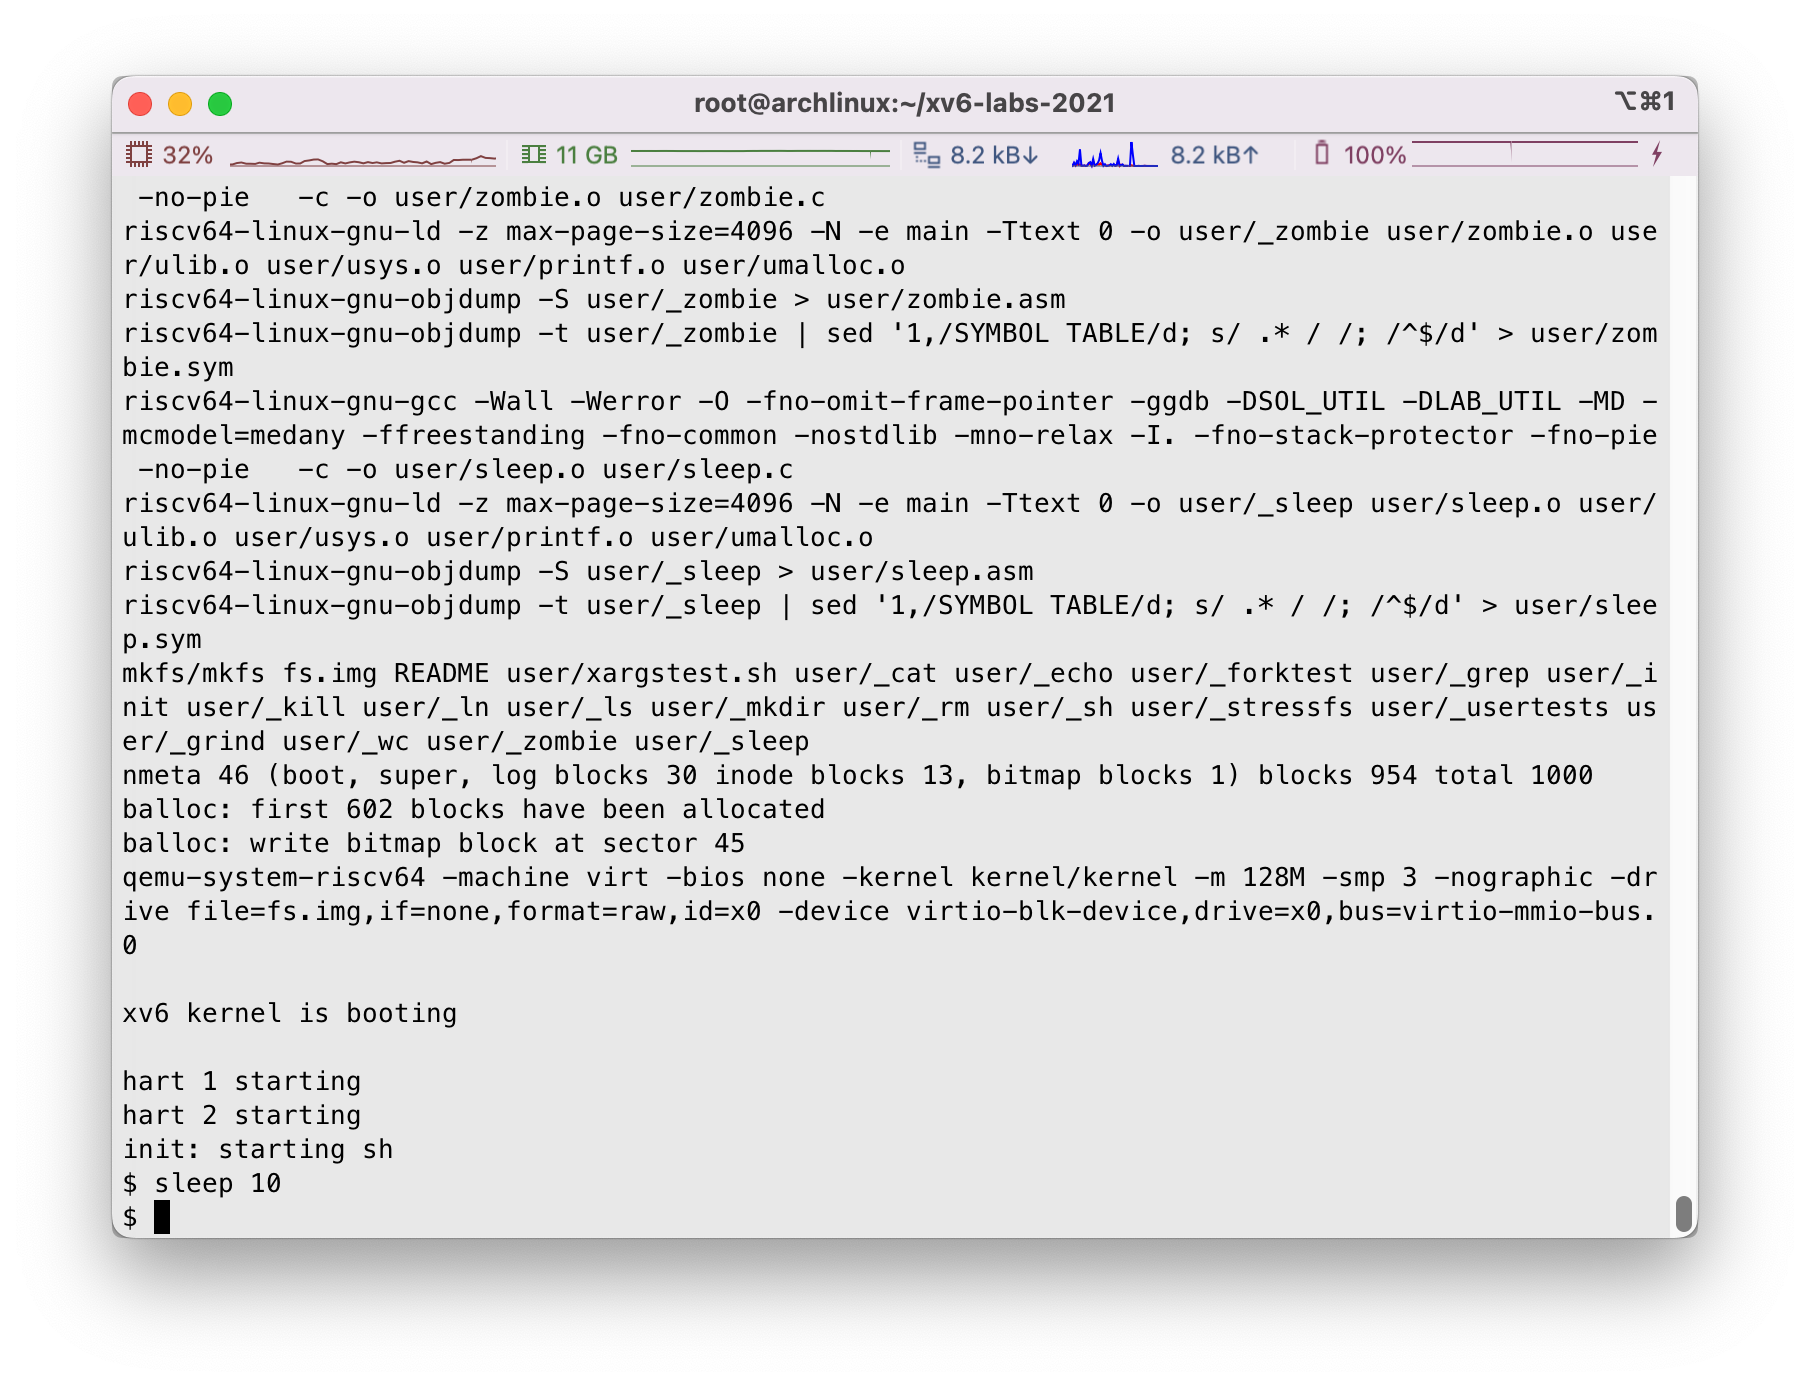
接下来我们使用make qemu进行编译,是可以顺利执行的:
测试
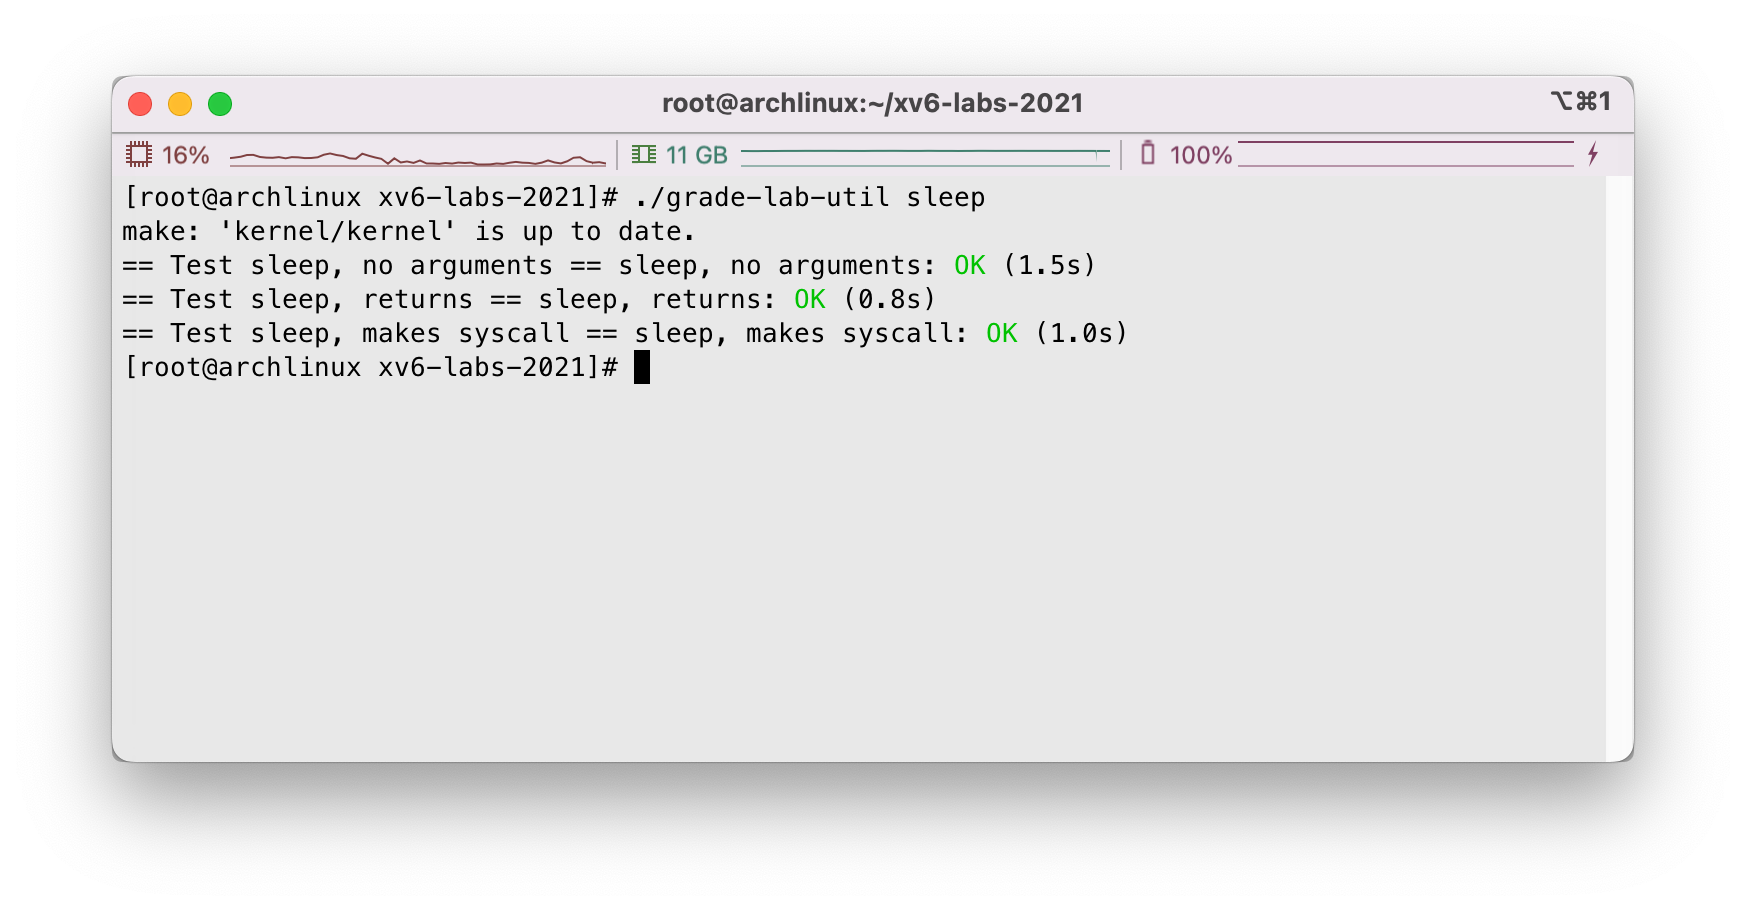
执行./grade-lab-util sleep可以看到通过测试:
观察
在user/user.h中,我们看到了一些的系统调用声明以及和少量的标准C库函数声明(存储在user/ulib.c中)
1
2
3
4
5
6
7
8
9
10
11
12
13
14
15
16
17
18
19
20
21
22
23
24
25
26
27
28
29
30
31
32
33
34
35
36
37
38
39
40
41
42
struct stat ;struct rtcdate ;int fork (void ) ;int exit (int ) __attribute__ ((noreturn )) ;int wait (int *) ;int pipe (int *) ;int write (int , const void *, int ) ;int read (int , void *, int ) ;int close (int ) ;int kill (int ) ;int exec (char *, char **) ;int open (const char *, int ) ;int mknod (const char *, short , short ) ;int unlink (const char *) ;int fstat (int fd, struct stat*) ;int link (const char *, const char *) ;int mkdir (const char *) ;int chdir (const char *) ;int dup (int ) ;int getpid (void ) ;char * sbrk (int ) ;int sleep (int ) ;int uptime (void ) ;int stat (const char *, struct stat*) ;char * strcpy (char *, const char *) ;void *memmove (void *, const void *, int ) ;char * strchr (const char *, char c) ;int strcmp (const char *, const char *) ;void fprintf (int , const char *, ...) ;void printf (const char *, ...) ;char * gets (char *, int max) ;uint strlen (const char *) ; void * memset (void *, int , uint) ;void * malloc (uint) ;void free (void *) ;int atoi (const char *) ;int memcmp (const void *, const void *, uint) ;void *memcpy (void *, const void *, uint) ;
例如刚才调用的atoi方法,在user/ulib.c中可以找到:
1
2
3
4
5
6
int atoi (const char *s) { int n; n = 0 ; while ('0' <= *s && *s <= '9' ) n = n * 10 + *s++ - '0' ; return n; }
在user/usys.S中看到,首先.global sleep在全局符号表中注册函数名sleep,之后调用sleep这个系统调用时就会执行以下这段RISC-V汇编代码:
1
2
3
4
5
.global sleep sleep: li a7, SYS_sleep ecall ret
含义大概是将SYS_sleep的值放入a7寄存器中,记录好系统调用的类型,随后使用ecall指令产生异常,陷入内核态。
在kernel/syscall.c中我们看到SYS_sleep和sys_sleep存在映射关系,syscall函数可以根据SYS_<name>值的不同执行不同的sys_<name>函数:
1
2
3
4
5
6
7
8
9
10
11
12
13
14
15
16
17
18
19
20
21
22
23
24
25
26
27
28
29
30
31
32
33
34
35
36
37
38
39
40
41
42
43
extern uint64 sys_chdir (void ) ;extern uint64 sys_close (void ) ;extern uint64 sys_dup (void ) ;extern uint64 sys_exec (void ) ;extern uint64 sys_exit (void ) ;extern uint64 sys_fork (void ) ;extern uint64 sys_fstat (void ) ;extern uint64 sys_getpid (void ) ;extern uint64 sys_kill (void ) ;extern uint64 sys_link (void ) ;extern uint64 sys_mkdir (void ) ;extern uint64 sys_mknod (void ) ;extern uint64 sys_open (void ) ;extern uint64 sys_pipe (void ) ;extern uint64 sys_read (void ) ;extern uint64 sys_sbrk (void ) ;extern uint64 sys_sleep (void ) ;extern uint64 sys_unlink (void ) ;extern uint64 sys_wait (void ) ;extern uint64 sys_write (void ) ;extern uint64 sys_uptime (void ) ;static uint64 (*syscalls[]) (void ) = { [SYS_fork] sys_fork, [SYS_exit] sys_exit, [SYS_wait] sys_wait, [SYS_pipe] sys_pipe, [SYS_read] sys_read, [SYS_kill] sys_kill, [SYS_exec] sys_exec, [SYS_fstat] sys_fstat, [SYS_chdir] sys_chdir, [SYS_dup] sys_dup, [SYS_getpid] sys_getpid, [SYS_sbrk] sys_sbrk, [SYS_sleep] sys_sleep, [SYS_uptime] sys_uptime, [SYS_open] sys_open, [SYS_write] sys_write, [SYS_mknod] sys_mknod, [SYS_unlink] sys_unlink, [SYS_link] sys_link, [SYS_mkdir] sys_mkdir, [SYS_close] sys_close, }; void syscall (void ) { int num; struct proc *p = num = p->trapframe->a7; if (num > 0 && num < NELEM(syscalls) && syscalls[num]) { p->trapframe->a0 = syscalls[num](); } else { printf ("%d %s: unknown sys call %d\n" , p->pid, p->name, num); p->trapframe->a0 = -1 ; } }
再回到kernel/sysproc.c下,我们可以看到sys_sleep的实现:
1
2
3
4
5
6
7
8
9
10
11
12
13
14
15
16
uint64 sys_sleep (void ) { int n; uint ticks0; if (argint(0 , &n) < 0 ) return -1 ; acquire(&tickslock); ticks0 = ticks; while (ticks - ticks0 < n) { if (myproc()->killed) { release(&tickslock); return -1 ; } sleep(&ticks, &tickslock); } release(&tickslock); return 0 ; }
实现pingpong
要求
我们需要实现一个程序,使用UNIX系统调用来实现在两个进程之间通过一对管道实现“Ping-Pong”一个字节。
即父进程发送一个字节给子进程,子进程收到后打印<pid>: received ping,其中<pid>是其进程ID,接下来子进程在和父进程通讯的管道上写入一字节,并退出,父进程收到后应当读取并打印<pid>: received pong,并退出。对应程序请写在user/pingpong.c中。
相关提示:
使用pipe来创建管道。
使用fork来创建子进程。
使用read从管道读,使用write向管道写。
使用getpid找到调用进程的进程ID。
记得将程序加入到Makefile的UPROG中。
用户程序有少量的库函数可以调用,见user/user.h。相应的源程序见user/ulib.c, user/printf.c和user/umalloc.c。
实现
由于管道是单向通信的,因此,我们需要使用两个管道来达到两个进程互相通信的目的,准确的说,一根管道parent2child用于父进程和子进程通信,另一根管道child2parent用于子进程和父进程的通信。
父进程向parent2child写1字节,随后子进程从parent2child中读出字节,并将其写入到child2parent中,最后由父进程从child2parent中读出。
1 2 3 4 5 6 7 8 9 10 11 12 13 14 15 16 17 18 19 20 21 22 23 24 25 26 27 28 29 30 31 32 33 34 35 36 37 38 39 40 41 42 43 44 45 46 47 48 49 50 51 52 53 54 55 #include "kernel/types.h" #include "kernel/stat.h" #include "user/user.h" int main (int argc, char *argv[]) { char buf[] = {'P' }; int parent2child[2 ]; int child2parent[2 ]; if (pipe(parent2child) == -1 ) { fprintf (2 , "Failed to create pipe parent2child\n" ); exit (1 ); } if (pipe(child2parent) == -1 ) { fprintf (2 , "Failed to create pipe child2parent\n" ); exit (1 ); } int pid = fork(); if (pid < 0 ) { fprintf (2 , "Failed to create the child process!\n" ); exit (1 ); } else if (pid == 0 ) { close(parent2child[1 ]); close(child2parent[0 ]); if (read(parent2child[0 ], buf, 1 ) != 1 ) { fprintf (2 , "Child: Failed to read from pipe parent2child!\n" ); exit (1 ); } printf ("%d: received ping\n" , getpid()); if (write(child2parent[1 ], buf, 1 ) != 1 ) { fprintf (2 , "Child: Failed to write to pipe child2parent!\n" ); exit (1 ); } exit (0 ); } else { close(parent2child[0 ]); close(child2parent[1 ]); if (write(parent2child[1 ], buf, 1 ) != 1 ) { fprintf (2 , "Parent: Failed to write to pipe parent2child!\n" ); exit (1 ); } if (read(child2parent[0 ], buf, 1 ) != 1 ) { fprintf (2 , "Parent: Fail to read from pipe child2parent!\n" ); exit (1 ); } printf ("%d: received pong\n" , getpid()); exit (0 ); } }
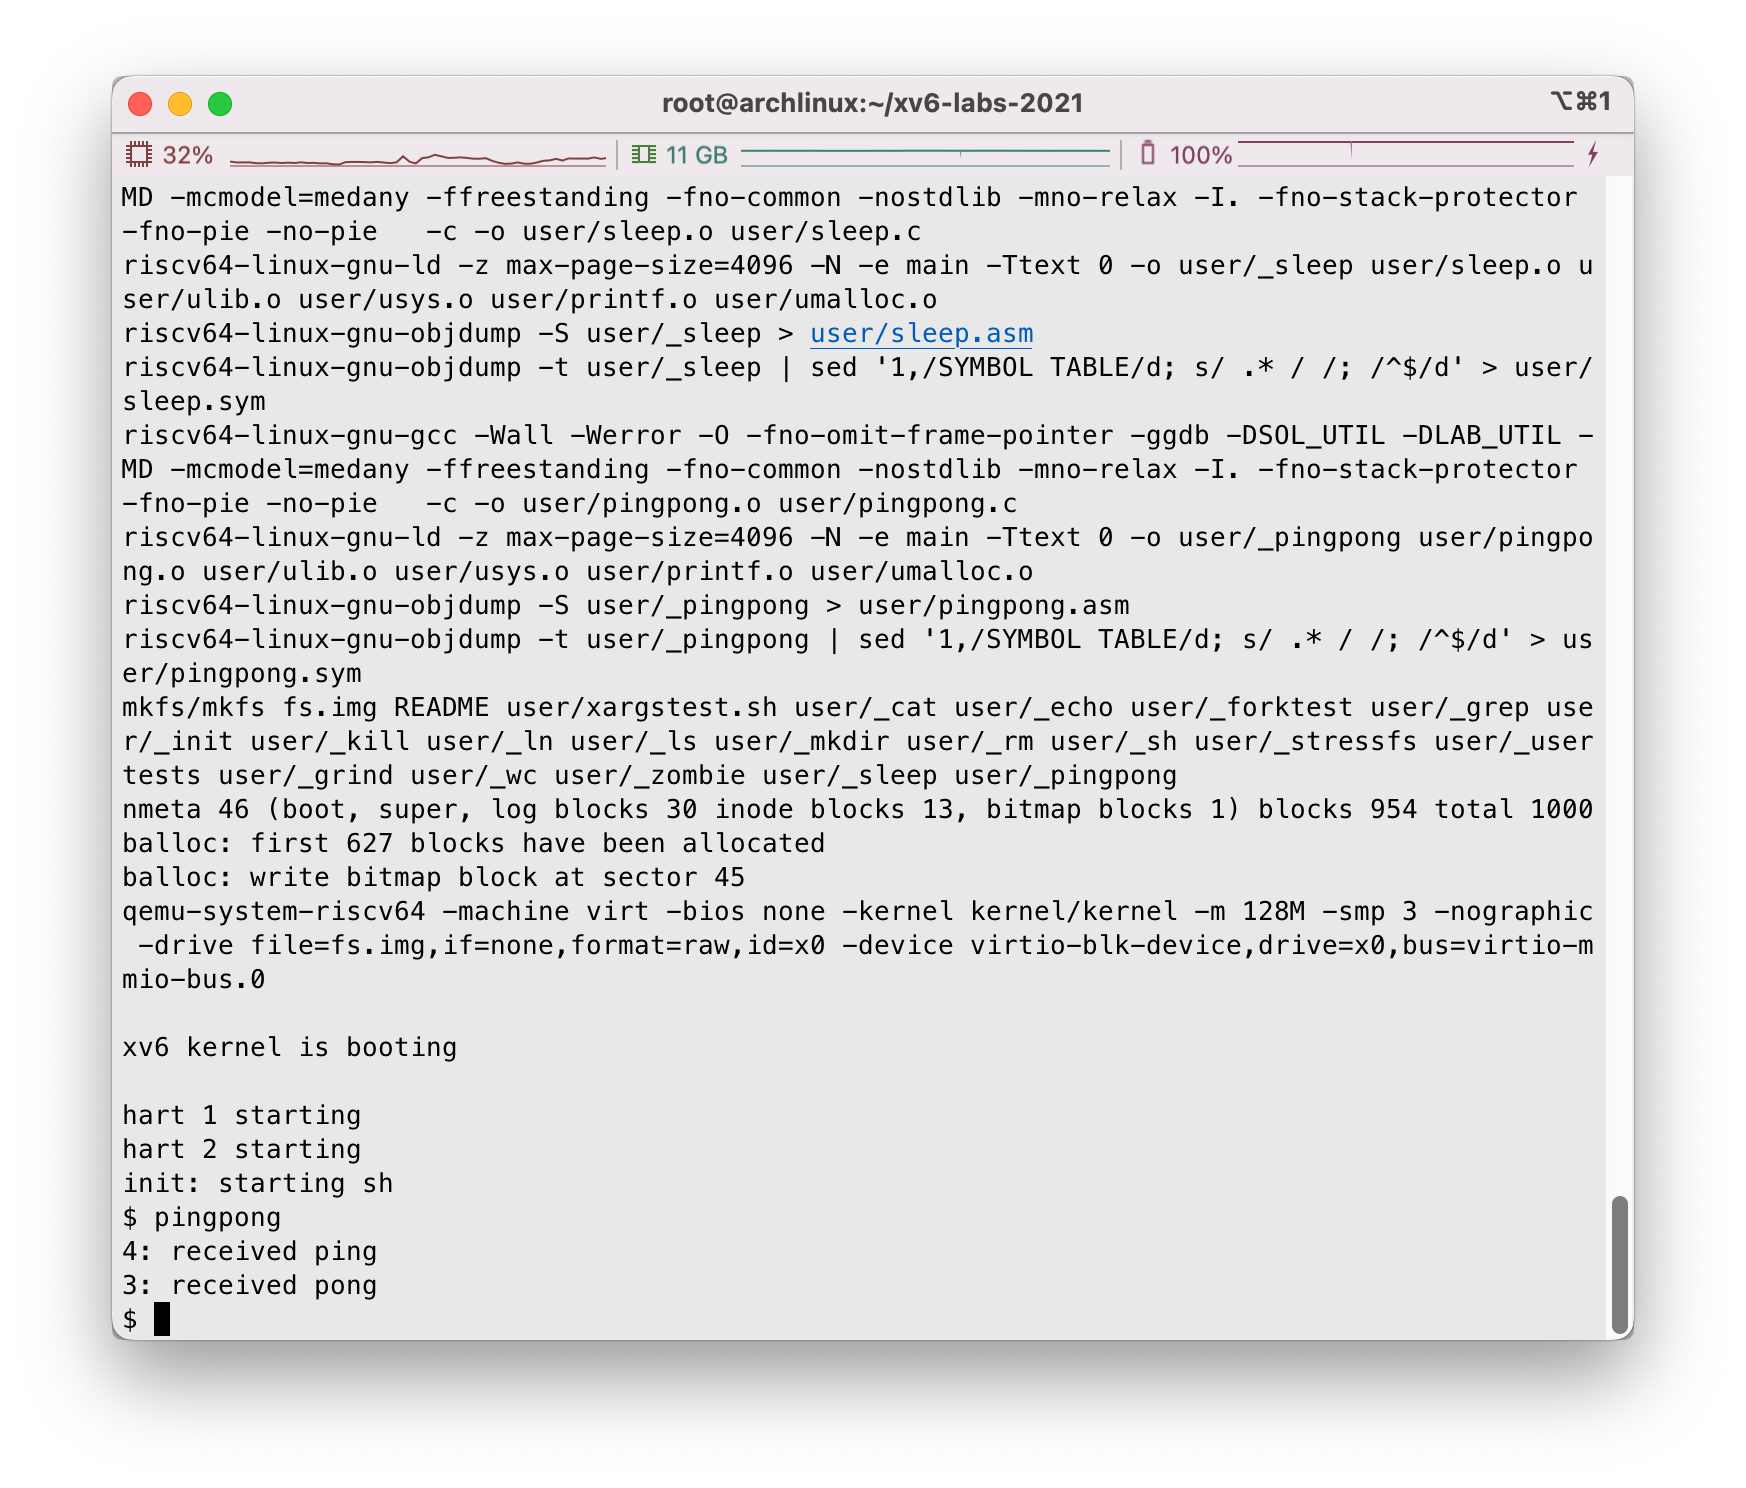
记得把pingpong加入到Makefile的UPROGS里面,尝试编译运行:
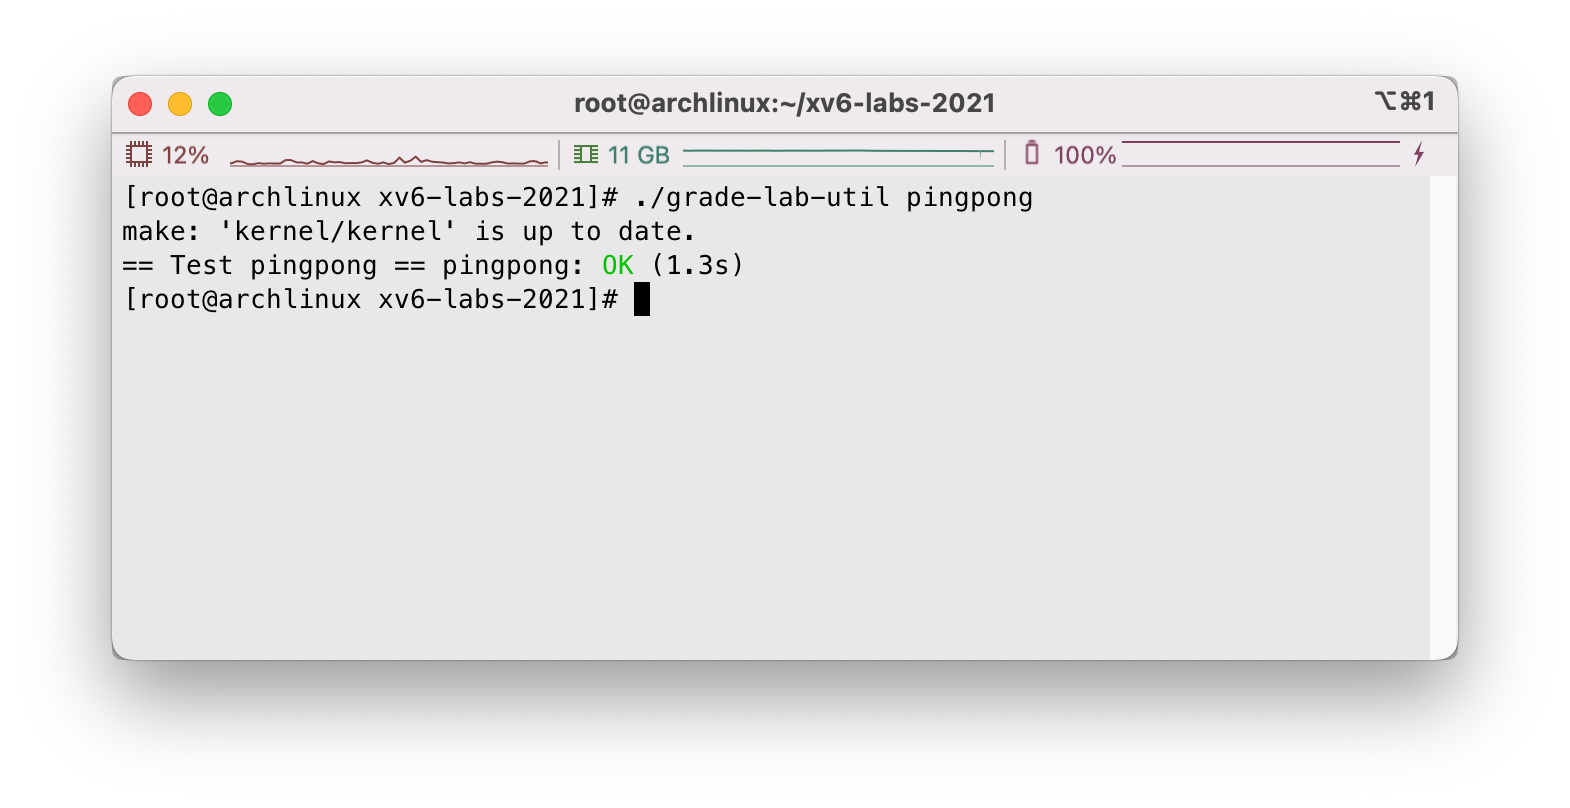
测试
执行./grade-lab-util pingpong对pingpong功能进行测试,没有问题:
实现primes
要求
我们需要使用管道实现一个并发版本的素数筛。这个想法源于Unix管道的发明者Doug McIlroy,参考:Bell Labs and CSP Threads 。对应程序需要完成在user/primes.c中。
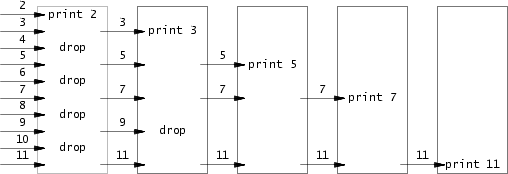
素数筛法 ,是一种快速“筛”出2~n之间所有素数的方法。朴素的筛法叫埃氏筛 (the Sieve of Eratosthenes,埃拉托色尼筛 ),这里甩个链接:
算法学习笔记(17): 素数筛
操作的伪代码为:
1
2
3
4
5
6
p = get a number from left neighbor print p loop: n = get a number from left neighbor if (p does not divide n) send n to right neighbor
所以这个问题就像是流水线一样,第一个进程将2~n依次写给第二个进程,第二个进程筛选非2倍数的数输出给第三个进程,第三个进程筛选非3倍数的数给第四个进程… 以此类推,单个阶段不一定要全部做完才交给后一阶段,完全可以像流水线一样进行。
我们的目标是使用pipe和fork来实现这样的流水线,我们将处理2~35的数字,进行素数筛。由于xv6的文件描述符和进程数量有限,第一个进程可以在35时停止。
提示如下:
注意及时关闭进程不需要的文件描述符,防止内存泄漏,在第一个进程达到35之前耗尽资源。
一旦第一个进程达到35,它应该等待直到整个管道结束,包括所有的子进程。因此,主质数进程应该只在打印完所有输出以及所有其他质数进程退出之后才退出。
当管道的写端关闭时,read调用会返回0(说明读到了文件末尾 EOF)。
可以直接向管道中写入32位(4字节)的整型数据,不需要使用格式化的 ASCII I/O。
仅按照流水线需要创建进程,不分配多余资源。
记得将程序加入Makefile中的UPROGS中。
实现
我们使用主进程输入2~35的数字,并在子进程中使用run_child进行筛选。在子进程中,我们选出第一个数作为需要打印的质数,接下来开启新的子进程,根据倍数关系进行筛选,并将筛选出的数发送给子进程。
总体上来看就是,主进程将2~n依次写给第一个子进程,第一个子进程筛选非2倍数的数输出给第二个子进程,第二个子进程筛选非3倍数的数给第三个子进程… 以此类推
1 2 3 4 5 6 7 8 9 10 11 12 13 14 15 16 17 18 19 20 21 22 23 24 25 26 27 28 29 30 31 32 33 34 35 36 37 38 39 40 41 42 43 44 45 46 47 48 49 50 51 52 53 54 55 56 57 58 59 60 61 62 63 64 65 66 67 68 69 70 71 72 73 74 75 #include "kernel/types.h" #include "kernel/stat.h" #include "user/user.h" #define prime_num 35 void run_child (int *read_pipe) { close(read_pipe[1 ]); int n, status; if ((status = read(read_pipe[0 ], &n, sizeof (int ))) == 0 ) { close(read_pipe[0 ]); exit (0 ); } else if (status == -1 ){ fprintf (2 , "Parent: Fail to read from pipe!\n" ); exit (1 ); } printf ("prime %d\n" , n); int parent_pipe[2 ]; if (pipe(parent_pipe) == -1 ) { fprintf (2 , "Failed to create pipe!\n" ); exit (1 ); } int pid = fork(); if (pid < 0 ) { fprintf (2 , "Failed to create child process!\n" ); exit (1 ); } else if (pid == 0 ) { close(read_pipe[0 ]); run_child(parent_pipe); } else { close(parent_pipe[0 ]); int num; while ((status = read(read_pipe[0 ], &num, sizeof (int ))) > 0 ) { if (num % n != 0 ) { if (write(parent_pipe[1 ], &num, sizeof (int )) == -1 ){ fprintf (2 , "Parent: Fail to write to pipe!\n" ); exit (1 ); } } } if (status == -1 ){ fprintf (2 , "Parent: Fail to read from pipe!\n" ); exit (1 ); } close(parent_pipe[1 ]); wait((int *) 0 ); } } int main (int argc, char *argv[]) { int input_pipe[2 ]; if (pipe(input_pipe) == -1 ) { fprintf (2 , "Failed to create pipe!\n" ); exit (1 ); } int pid = fork(); if (pid < 0 ) { fprintf (2 , "Failed to create child process!\n" ); exit (1 ); } else if (pid == 0 ) { run_child(input_pipe); } else { close(input_pipe[0 ]); for (int i = 2 ; i <= prime_num; i++) { if (write(input_pipe[1 ], &i, sizeof (int )) == -1 ){ fprintf (2 , "Parent: Fail to write to pipe!\n" ); exit (1 ); } } close(input_pipe[1 ]); wait((int *) 0 ); } exit (0 ); }
记得将primes加入到Makefile的UPROGS中。
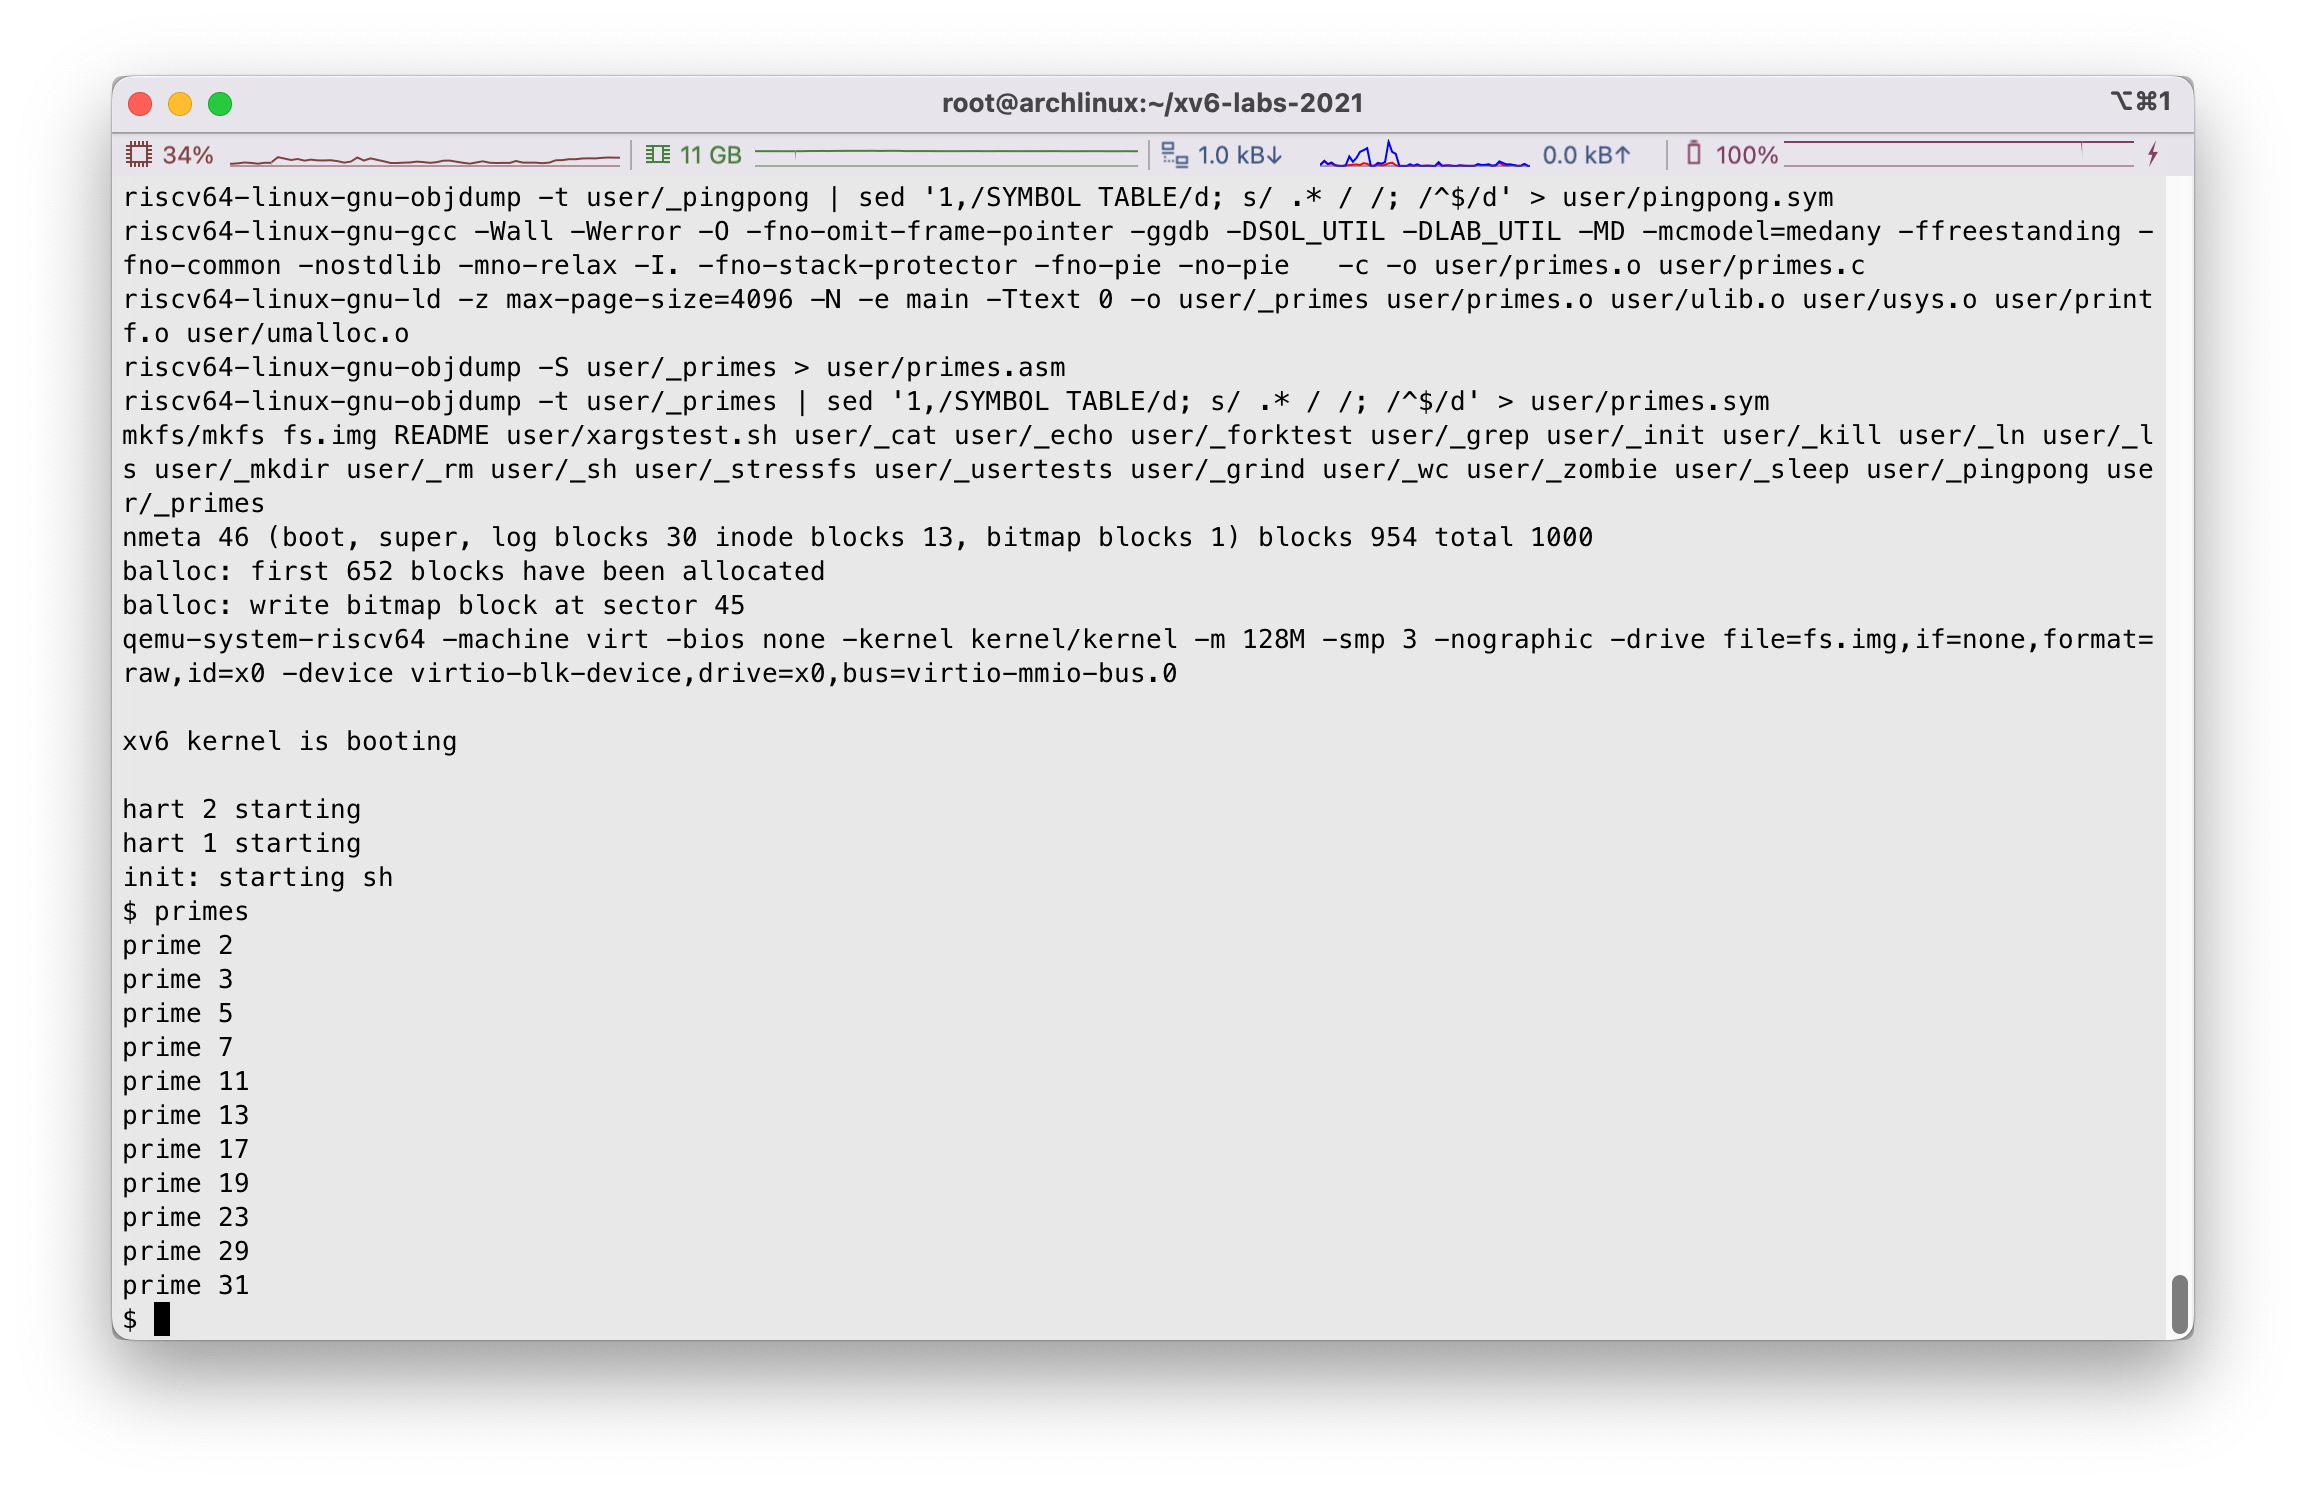
使用make qemu进行编译,我们看到:
测试
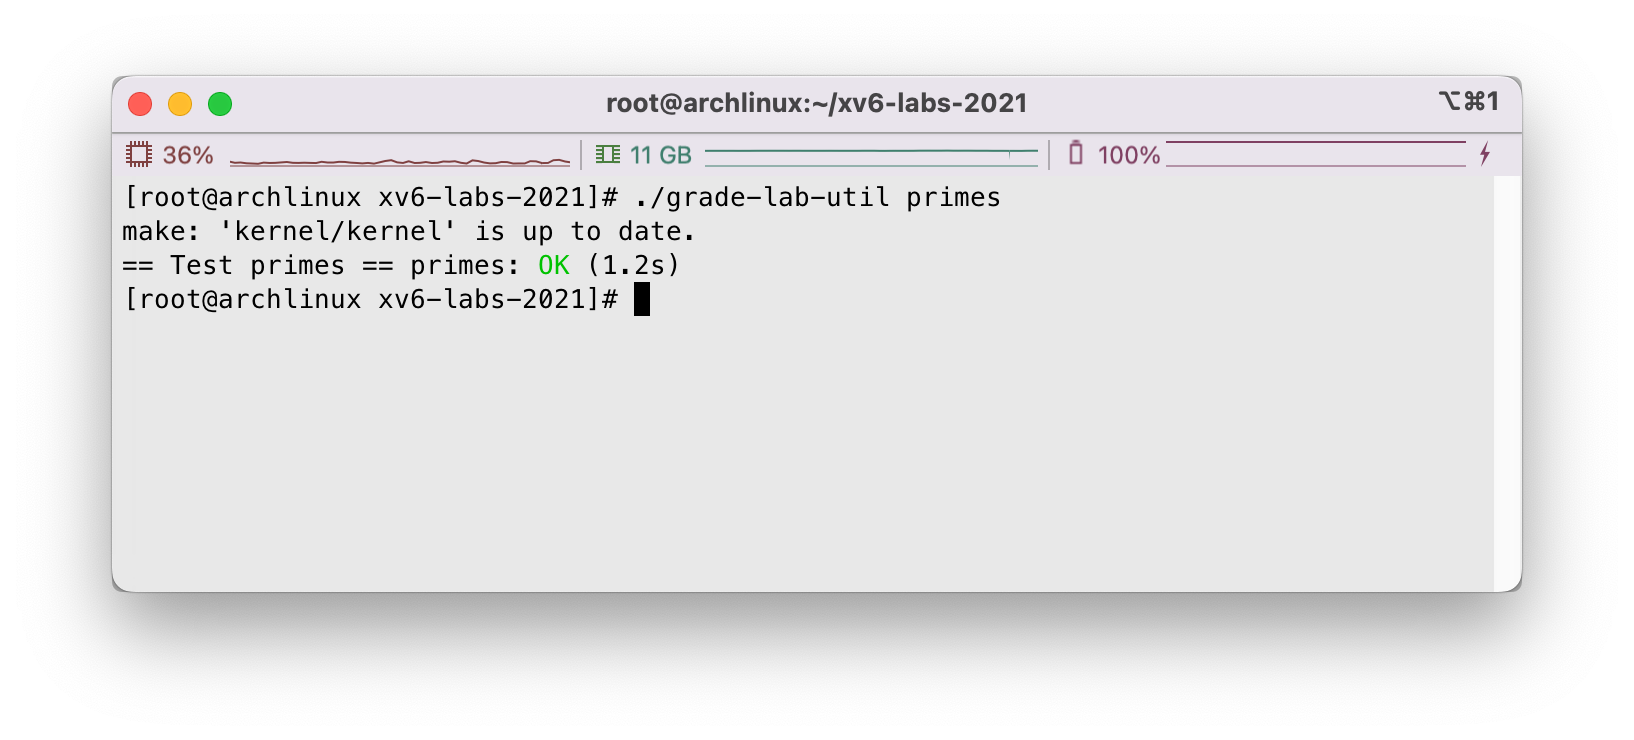
使用./grade-lab-util primes进行测试,我们看到:
实现find
要求
实现一个简单的findUNIX程序,通过该程序我们可以查找目录树下的给定具体名字的所有文件。完成的程序包存在user/find.c中。
相关提示:
参考user/ls.c程序,查看如何读取文件夹。
使用递归来逐层深入子目录。但是没有必要进入.或者..目录。
由于文件系统发生改变,需要对程序进行重新编译,请执行make clean; make qemu。
记得将find加入到Makefile中。
实现
结果不是很难,首先我们看到以下两个数据结构。
首先是dirent结构体:
1 2 3 4 5 6 7 #define DIRSIZ 14 struct dirent { ushort inum; char name[DIRSIZ]; };
dirent结构体存储的关于文件的信息很少,所以dirent同样也是起着一个索引的作用。
接下来是stat结构体,其中存储了大量的文件信息,例如文件类型、文件大小等:
1 2 3 4 5 6 7 8 9 10 11 #define T_DIR 1 #define T_FILE 2 #define T_DEVICE 3 struct stat { int dev; uint ino; short type; short nlink; uint64 size; };
我们可以使用:
1
2
int fstat (int fd, struct stat*) ;int stat (const char *, struct stat*) ;
给定指定的打开的文件描述符或者文件路径,将文件信息写入到stat结构中去。
程序的思路较为简单,我们首先查看给出的路径是目录还是文件,如果是文件则直接比对末尾的文件名,否则对文件夹内部进行遍历,也就是顺序读取fd,如果是文件夹就递归继续查找,如果是文件则比对文件名…
1 2 3 4 5 6 7 8 9 10 11 12 13 14 15 16 17 18 19 20 21 22 23 24 25 26 27 28 29 30 31 32 33 34 35 36 37 38 39 40 41 42 43 44 45 46 47 48 49 50 51 52 53 54 55 56 57 58 59 60 61 62 63 64 65 66 67 68 69 70 #include "kernel/types.h" #include "kernel/stat.h" #include "user/user.h" #include "kernel/fs.h" char *fmtname (char *path) { char *p; for (p = path + strlen (path); p >= path && *p != '/' ; p--) ; p++; return p; } void find (char *directory, char *filename) { char buf[512 ], *p; int fd; struct dirent de ; struct stat st ; if ((fd = open(directory, 0 )) < 0 ) { fprintf (2 , "ls: cannot open %s\n" , directory); return ; } if (fstat(fd, &st) < 0 ) { fprintf (2 , "ls: cannot stat %s\n" , directory); close(fd); return ; } switch (st.type) { case T_FILE: if (strcmp (fmtname(directory), filename) == 0 ) { printf ("%s \n" , directory); } break ; case T_DIR: if (strlen (directory) + 1 + DIRSIZ + 1 > sizeof buf) { printf ("find: path is too long \n" ); break ; } strcpy (buf, directory); p = buf + strlen (buf); *p++ = '/' ; while (read(fd, &de, sizeof (de)) == sizeof (de)) { if (de.inum == 0 || strcmp ("." , de.name) == 0 || strcmp (".." , de.name) == 0 ) { continue ; } memmove(p, de.name, DIRSIZ); p[DIRSIZ] = 0 ; if (stat(buf, &st) < 0 ) { printf ("ls: cannot stat %s\n" , buf); continue ; } find(buf, filename); } break ; } close(fd); } int main (int argc, char *argv[]) { if (argc != 3 ) { fprintf (2 , "Usage: find <directory> <filename>\n" ); exit (1 ); } find(argv[1 ], argv[2 ]); exit (0 ); }
可以看到,其实遍历文件夹内部的过程,不需要对文件再进行文件夹和文件的分类讨论了,因为find本身就能处理文件和文件夹的路径。
测试
记得在Makefile下添加find。
在主目录下使用make clean; make qemu进行编译。
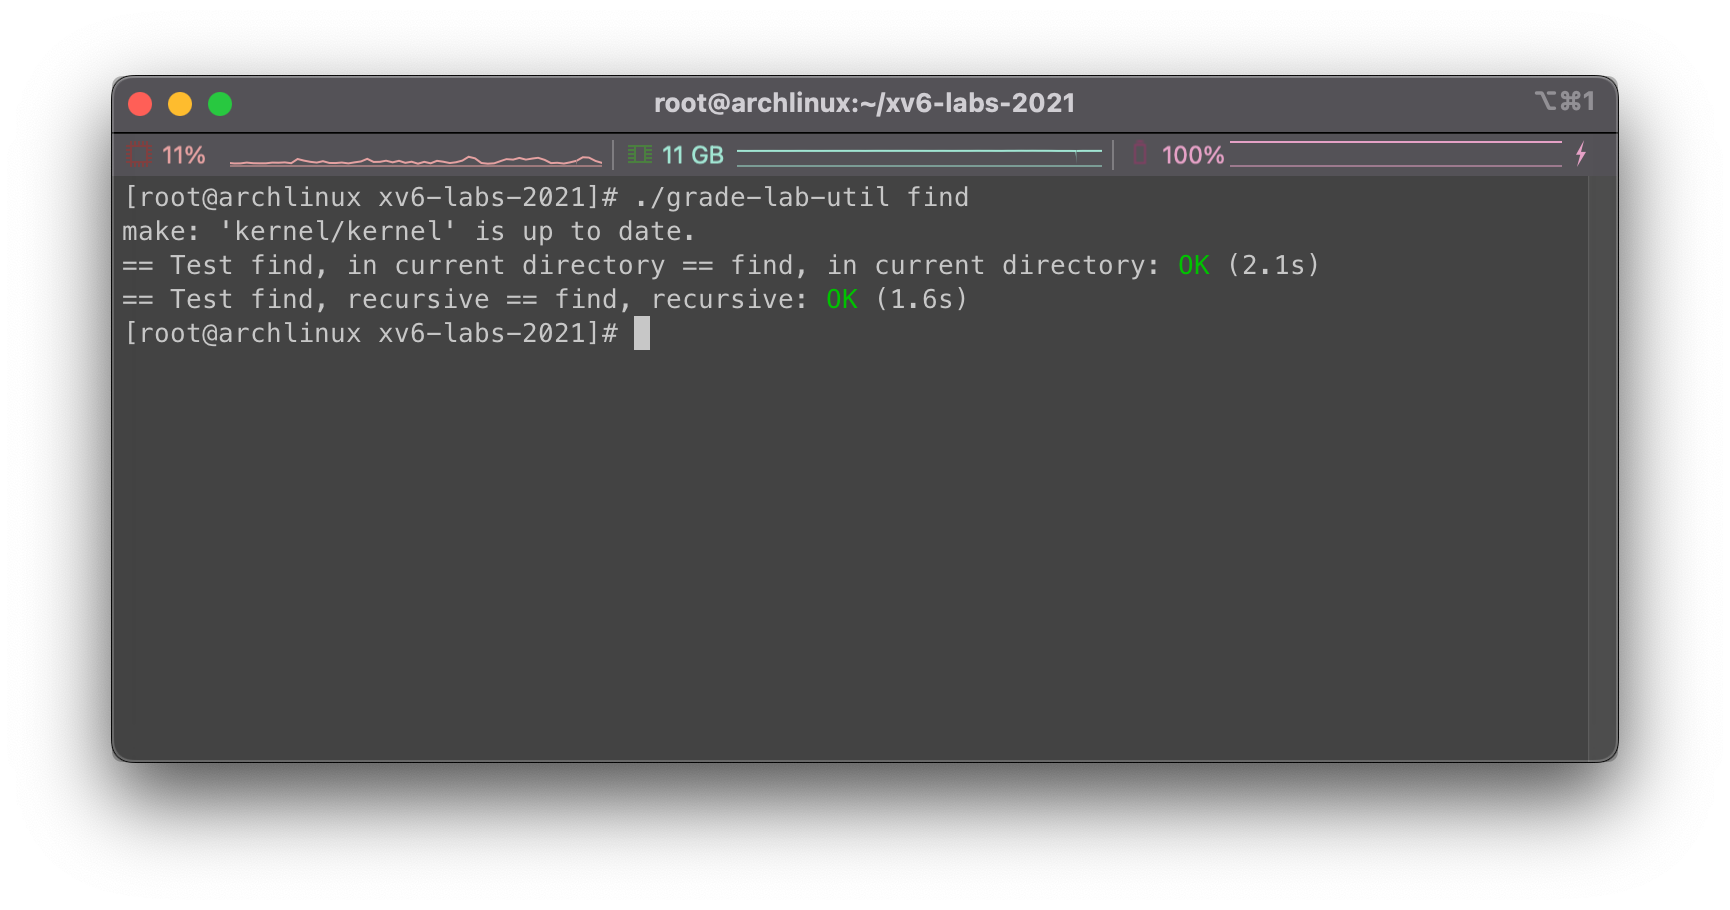
调用./grade-lab-util find:
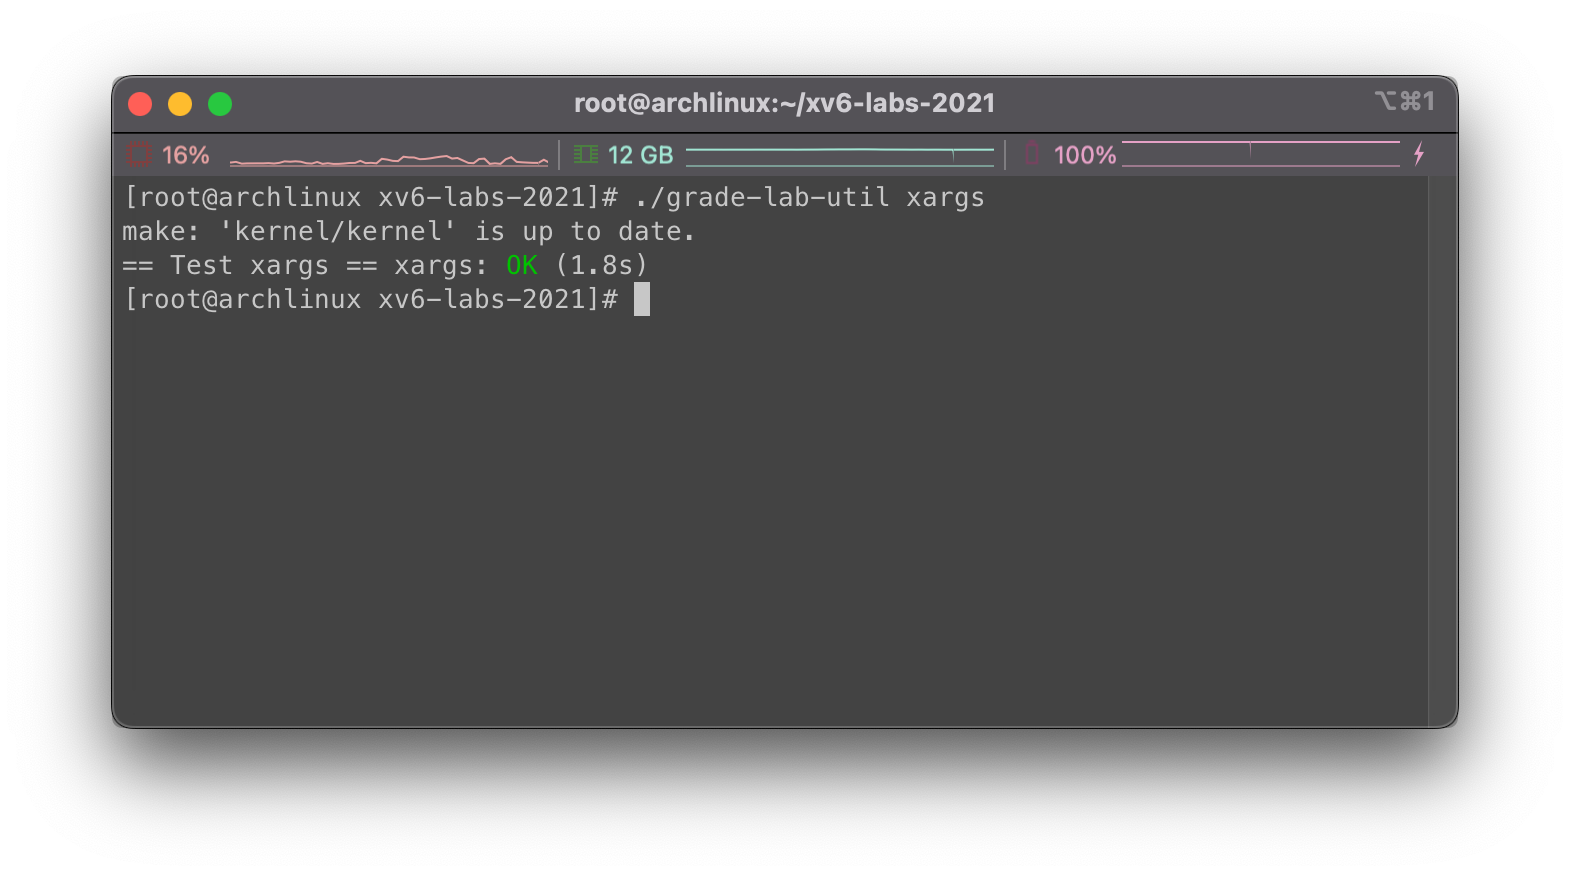
实现xargs
要求
实现一个简单的xargs程序,从标准输入中读取参数并附加到后续的命令中去,按行读取。程序写在user/xargs.c中。
注意点:
使用fork和exec来执行每一行输入的命令。使用wait来等待子进程的结束。
每次读取一行,不断读取一个字符,直到遇到\n。
可以指定MAXARG,即exec最多使用的参数数量。
记得把xargs加入Makefile,并使用make clean; make qemu重新编译。
实现
首先把args后的参数读入参数列表,并提取出要执行的命令,接下来从标准输入中取出各个参数即可。
我们选择将所有标准输入的参数保存在一个字符数组buf中,以\0隔开。
1 2 3 4 5 6 7 8 9 10 11 12 13 14 15 16 17 18 19 20 21 22 23 24 25 26 27 28 29 30 31 32 33 34 35 36 37 38 39 40 41 42 43 44 45 46 47 48 #include "kernel/types.h" #include "kernel/stat.h" #include "user/user.h" #include "kernel/param.h" #define MAXLEN 1024 int main (int argc, char *argv[]) { char *_argv[MAXARG]; char buf[MAXLEN]; char ch; int stat; if (argc < 2 ) { fprintf (2 , "usage: xargs command\n" ); exit (1 ); } for (int i = 1 ; i < argc; i++){ _argv[i - 1 ] = argv[i]; } while (1 ) { int index = 0 ; int arg_begin = 0 ; int argv_cnt = argc - 1 ; while (1 ) { stat = read(0 , &ch, 1 ); if (stat == 0 ) exit (0 ); if (ch == ' ' || ch == '\n' ) { buf[index++] = '\0' ; _argv[argv_cnt++] = &buf[arg_begin]; arg_begin = index; if (ch == '\n' ) break ; } else { buf[index++] = ch; } } _argv[argv_cnt] = (char *)0 ; if (fork() == 0 ) { exec(_argv[0 ], _argv); } else { wait((int *)0 ); } } exit (0 ); }
测试
执行make clean; make qemu,测试结果如下:
结果测试
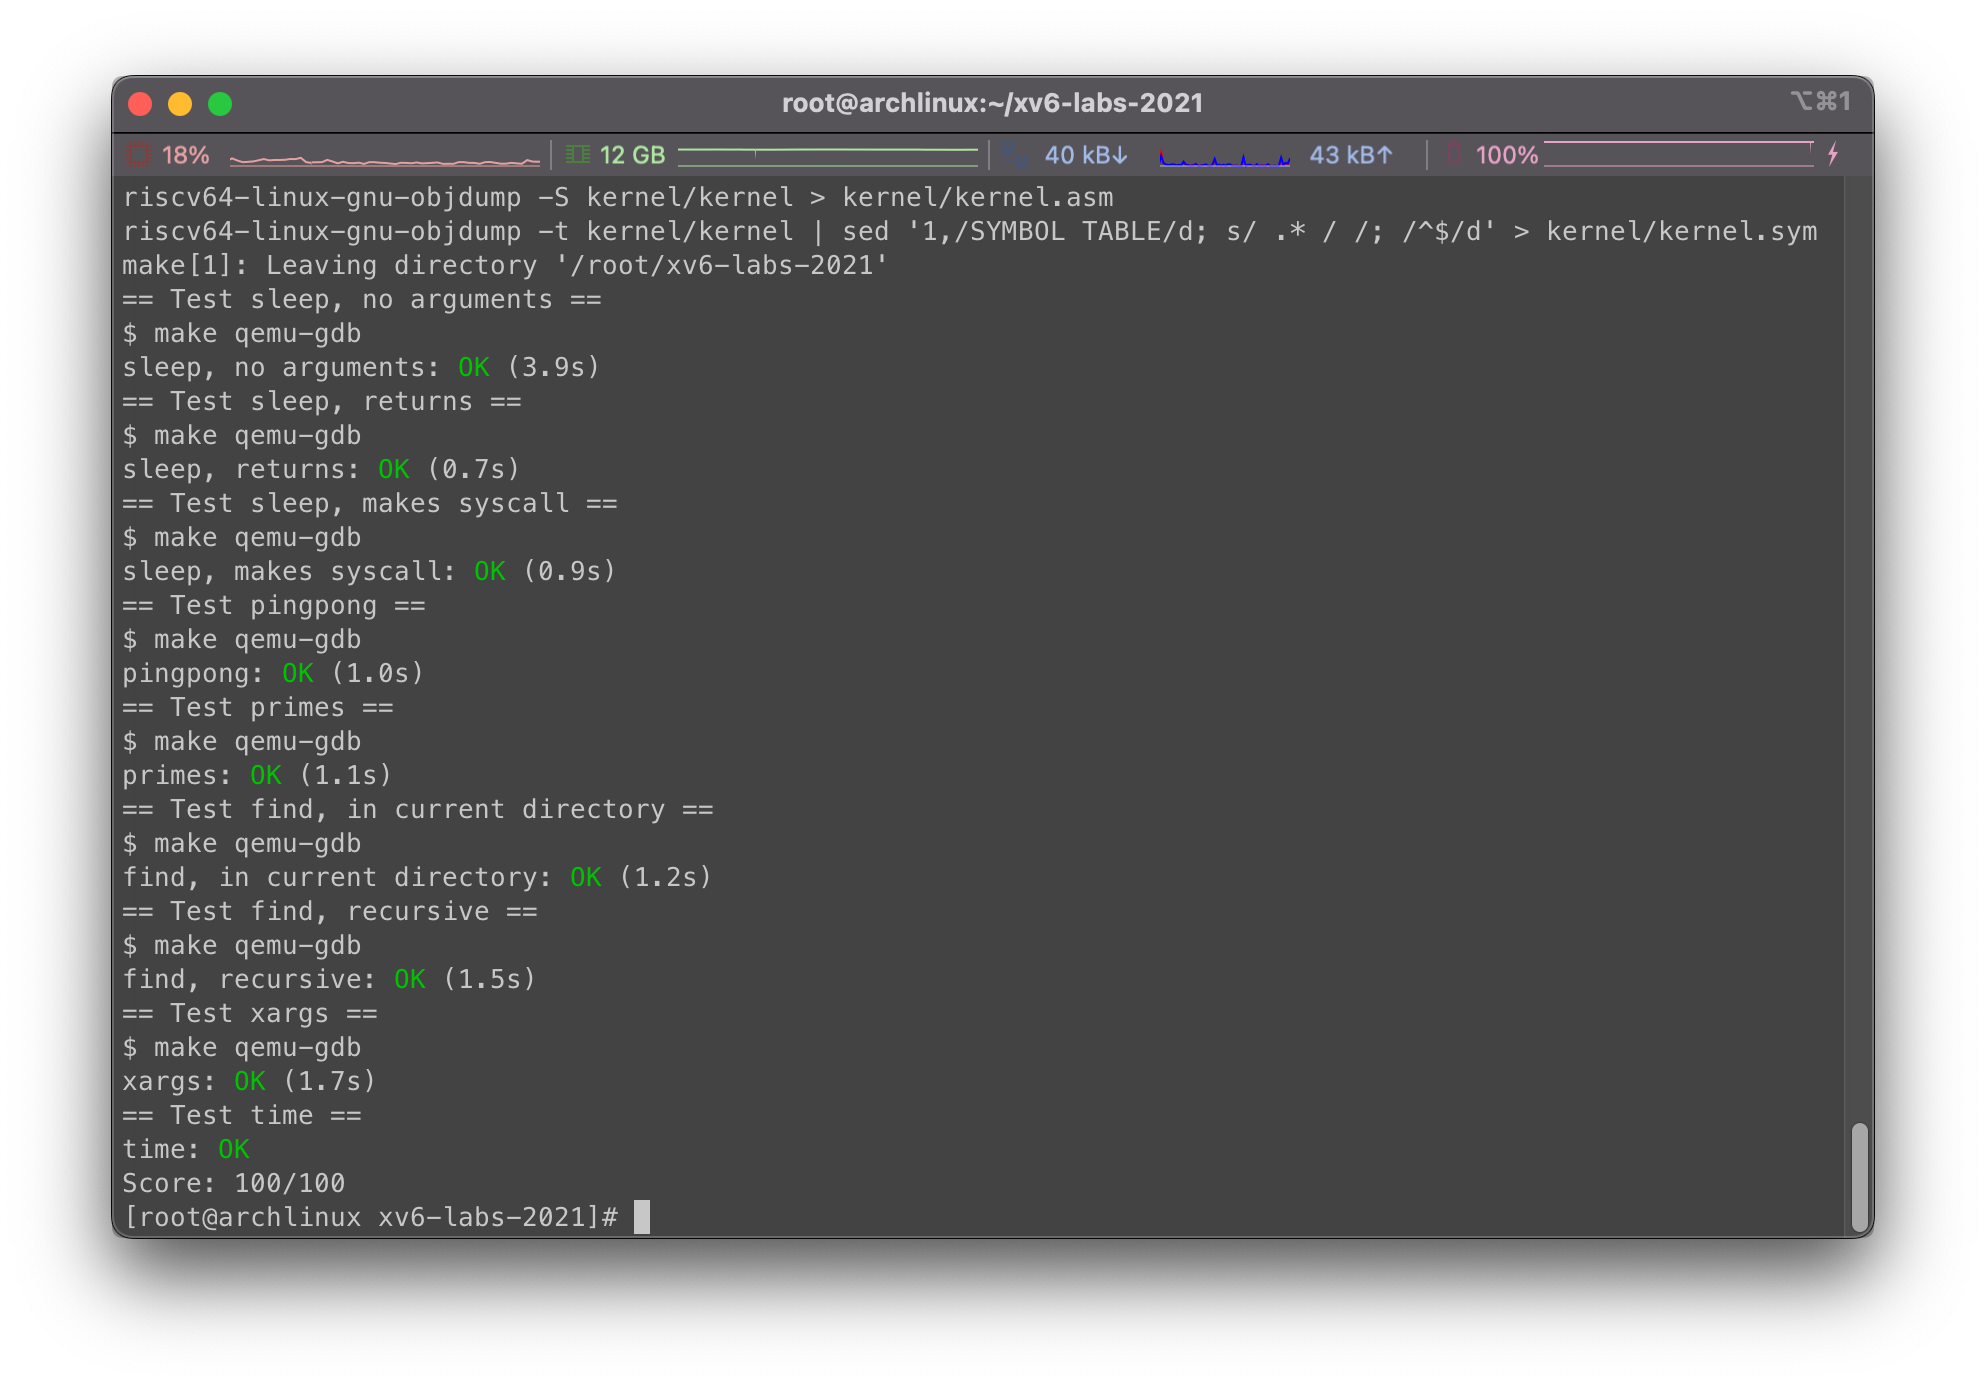
在主目录下添加文件time.txt,写入一个整数表示花费的时间,随后使用make grade进行测试:
总结
感觉自己C还是写少了,经常出恶心我自己的bug,debug起来也是很痛苦…
还得练练,继续吧… 没想到写几个调用系统调用的程序也能这么累